This is a compilation of most of the projects I've worked on in my spare time. Most were for fun, some were for profit, but every one of these projects taught me something new and helped me become the engineer I am today.
Ceiling Fan Lights (2012)
|
Before I learned how to use Eagle to lay out PCBs, I used more of a brute force method: copper tape on card stock. I made a few different flashing LED circuits designed to go on ceiling fans to create cool lighting effects at night.
|
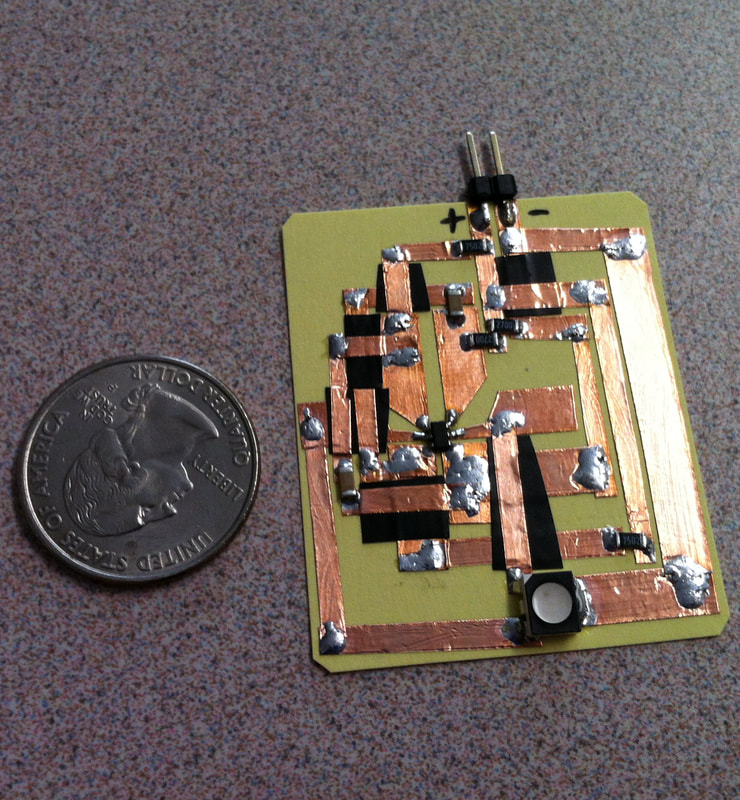
Copper tape, card stock, a few components and decent soldering skills were all I needed.
|
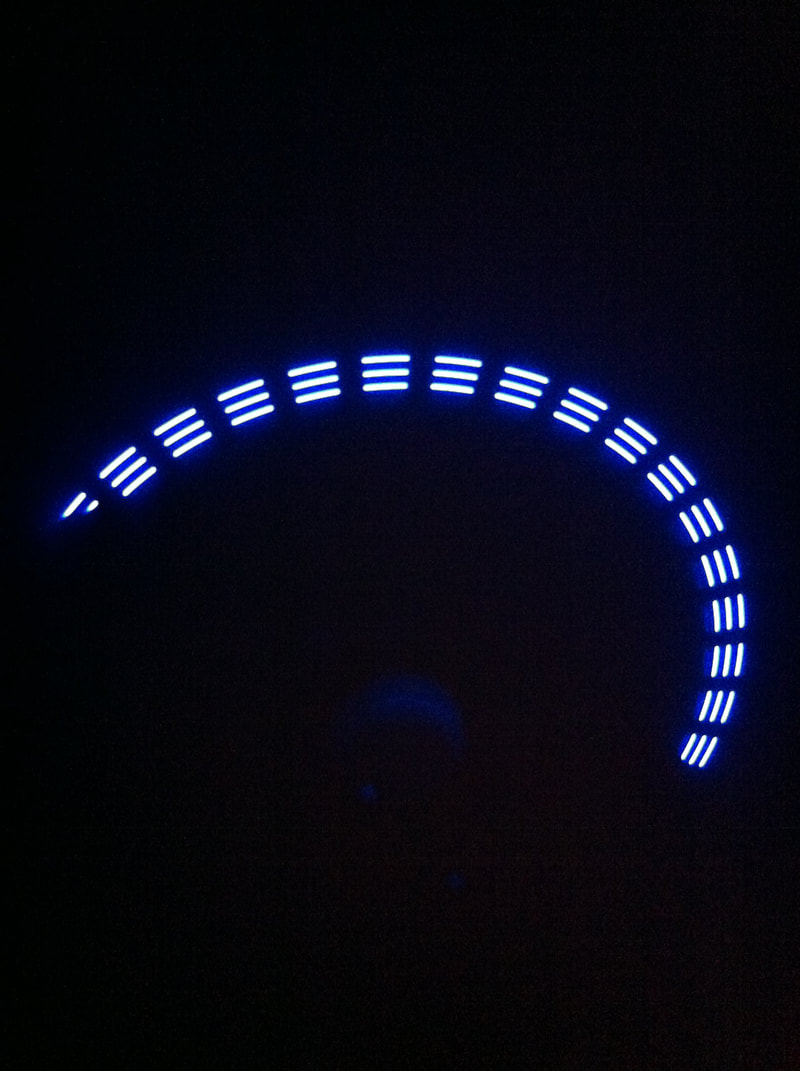
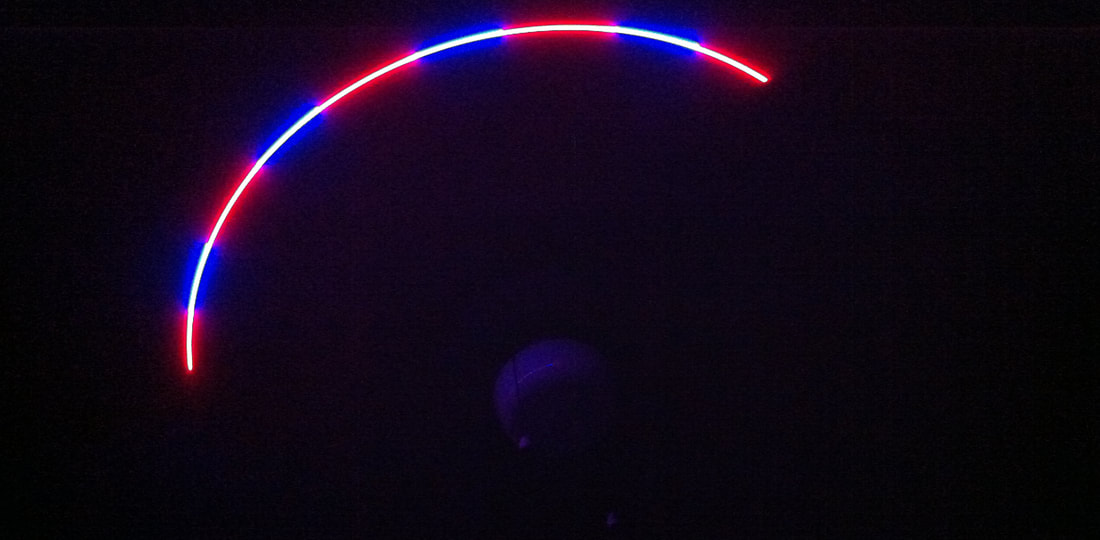
Strip of 3 flashing LEDs on my ceiling fan.
|
Laser-cut iPhone 4 Case (2012)
|

|
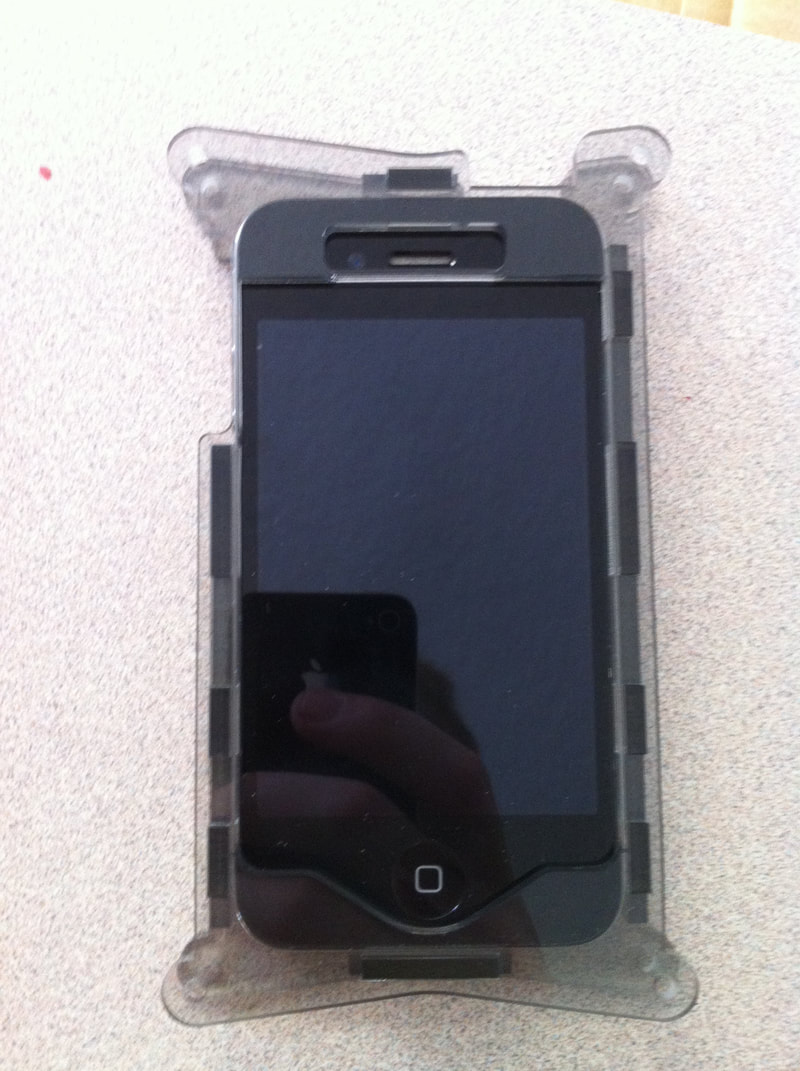
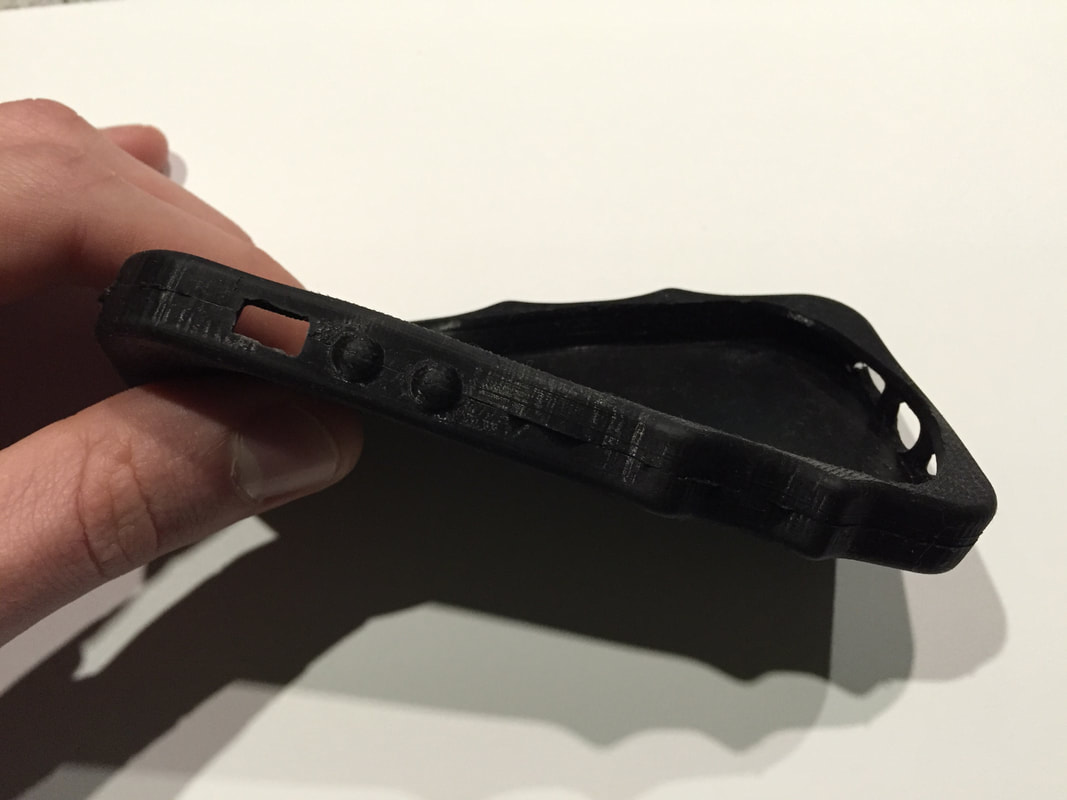
I used a free student license of AutoCAD to design this phone case for my iPhone, and an online laser cutting service to cut the parts. I learned a lot about tolerances here, as the parts had to fit together pretty snugly to work properly as a case.
|
Wheel Gun (2012)
|
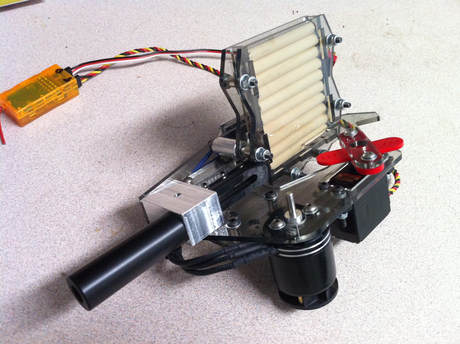
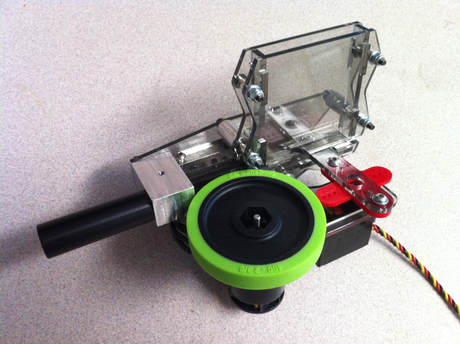
Based on the pitching machines used in baseball, this “wheel gun” was an attempt to use that same concept to shoot wooden dowel segments semi-automatically. There was no intent to harm anyone, the design was just for fun.
The design featured a gravity-fed 10 round magazine, servo-driven loader, and machined aluminum and Delrin parts for the barrel assembly. It ended up working reasonably well. The acrylic parts were ordered alongside the iPhone case parts seen in the last project and arrived on the same sheet of material. |
|
Screw Drive (2012)
|
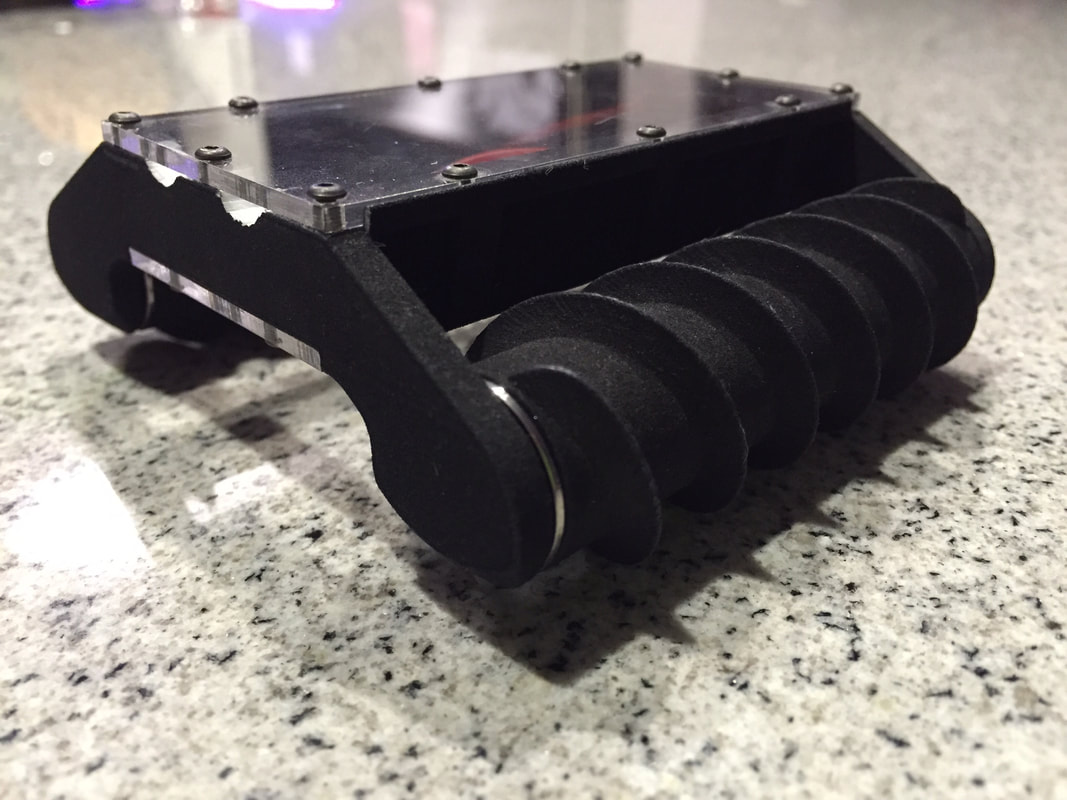
Inspired by an online video of a Russian off-road vehicle, the ZIL-2906, and empowered by the rise of 3D printing, I set out to create a small, radio-controlled version of a screw-drive vehicle. This was my first 3D print ever, done through an online SLS 3D printing service.
This vehicle was designed in Autodesk Inventor so that the gear motors would be completely enclosed inside of its pontoons, and the rest of the electronics would reside within the main body. It ended up working quite well and is very fun to drive! |
Molded Silicone iPhone 5 Case (2013)
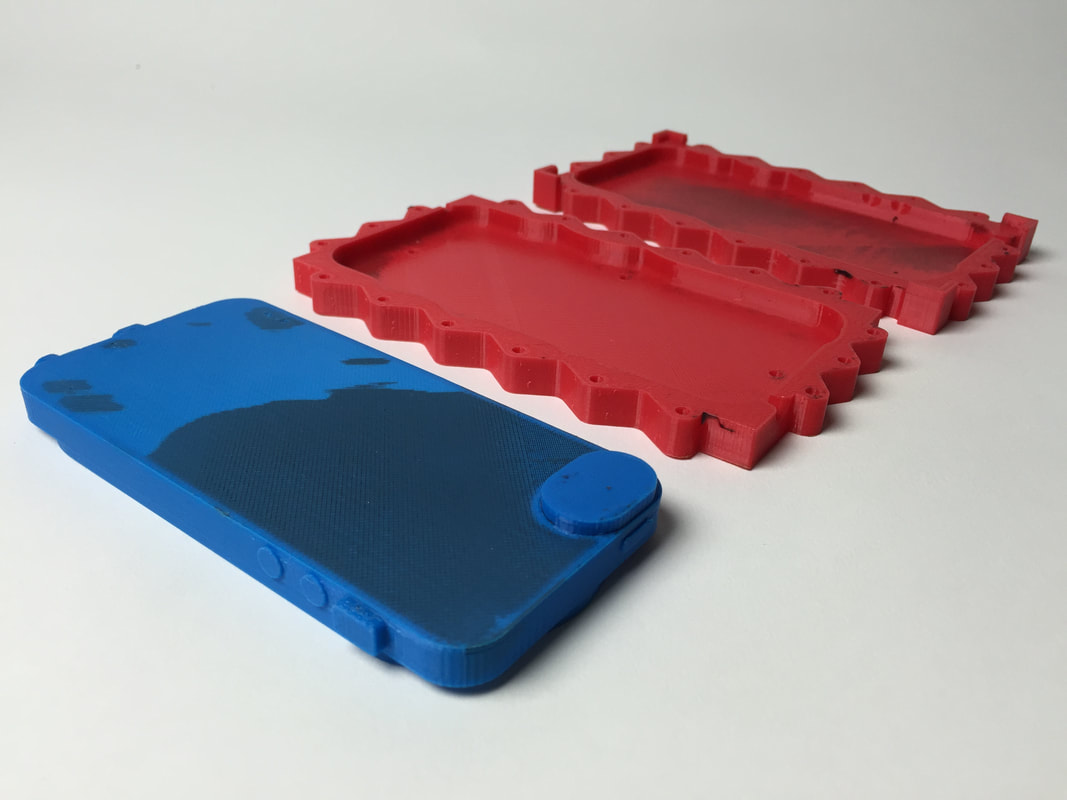
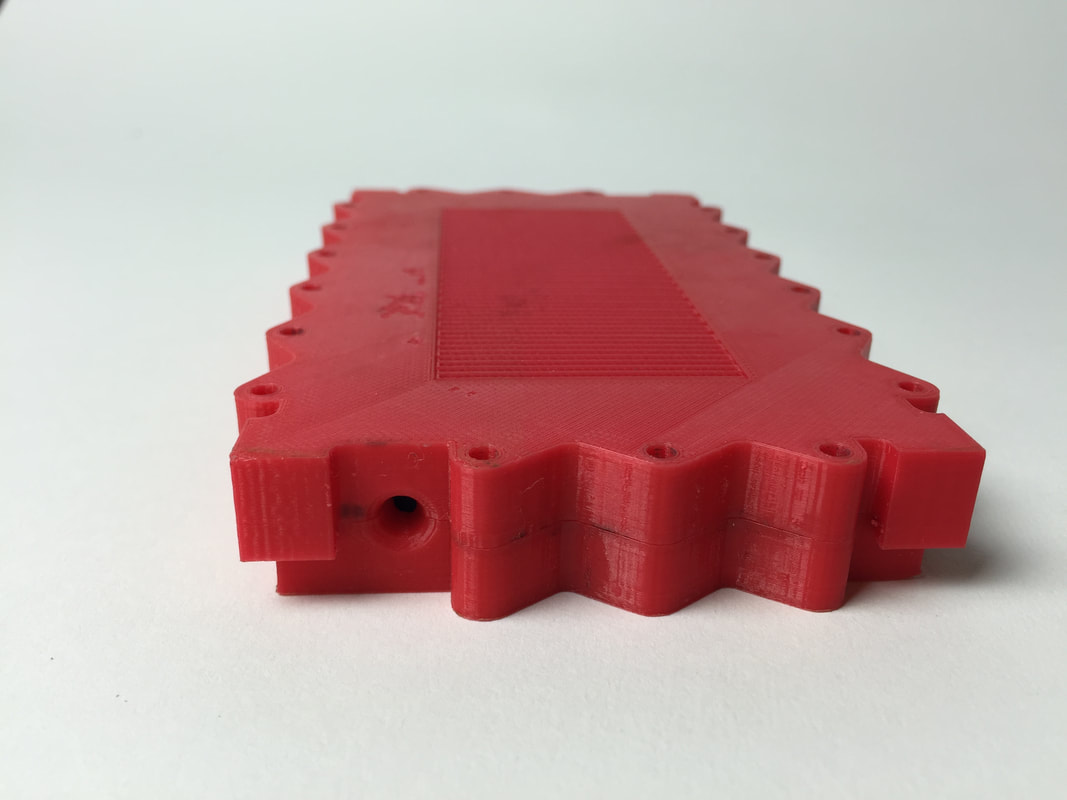
Pursuing my interest in molding liquid silicone parts, I decided to design an iPhone case mold with CAD, 3D print it, and then inject silicone. The 3D printed parts were designed so that the silicone could be injected from the bottom with a syringe, to avoid air bubbles.
Additionally, while the end product sports no noticeable special aesthetic features, the ridges along each side were designed to cradle my fingers where I personally preferred to hold my phone while talking on it. I used this personalized silicone phone case for years.
Additionally, while the end product sports no noticeable special aesthetic features, the ridges along each side were designed to cradle my fingers where I personally preferred to hold my phone while talking on it. I used this personalized silicone phone case for years.
Molded Tires and Wheels (2014)
|
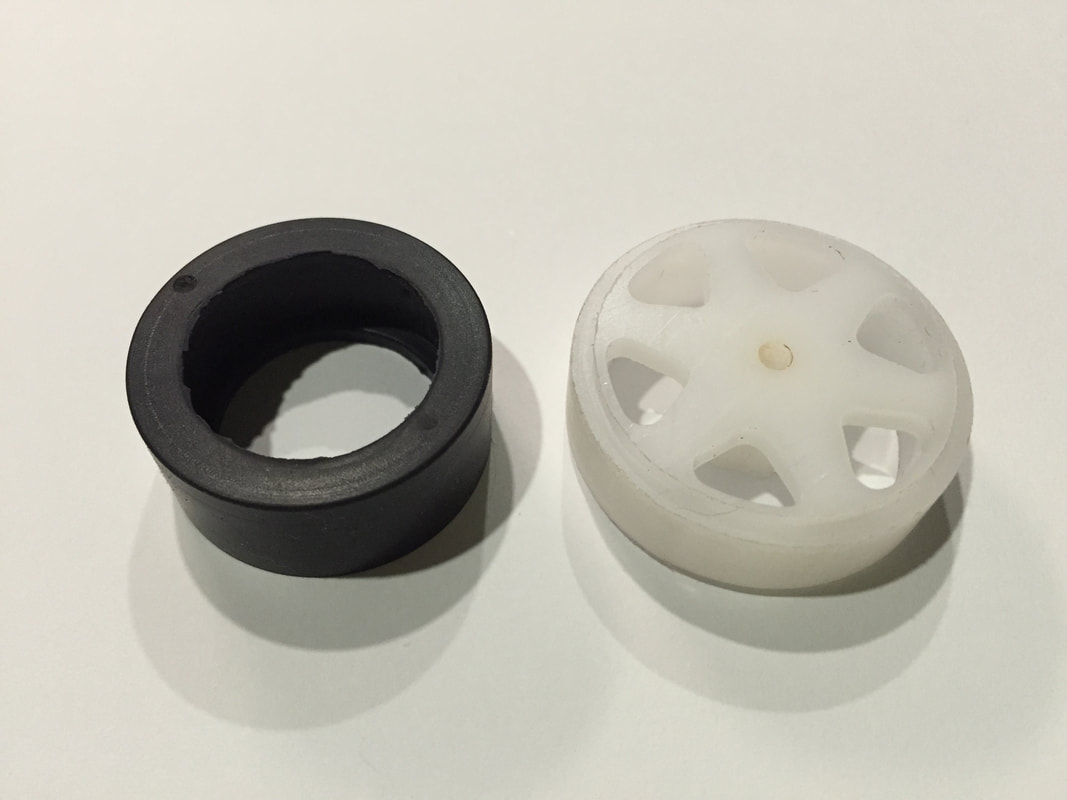
After completing the restoration of a 30-year-old small CNC mill, I wanted to make myself a set of wheels for general robotics use that suited my needs better than any product readily available at the time. I also needed tires, so I used BOBCAD/CAM to program the machine to make my wheels, as well as mold components for the tires.
The tire mold, as well as the wheel itself, were machined from Delrin plastic. The tire mold was designed so that the tire would have to stretch over the wheel, for a more secure fit. |

Silent Spy Robot (2014)
|
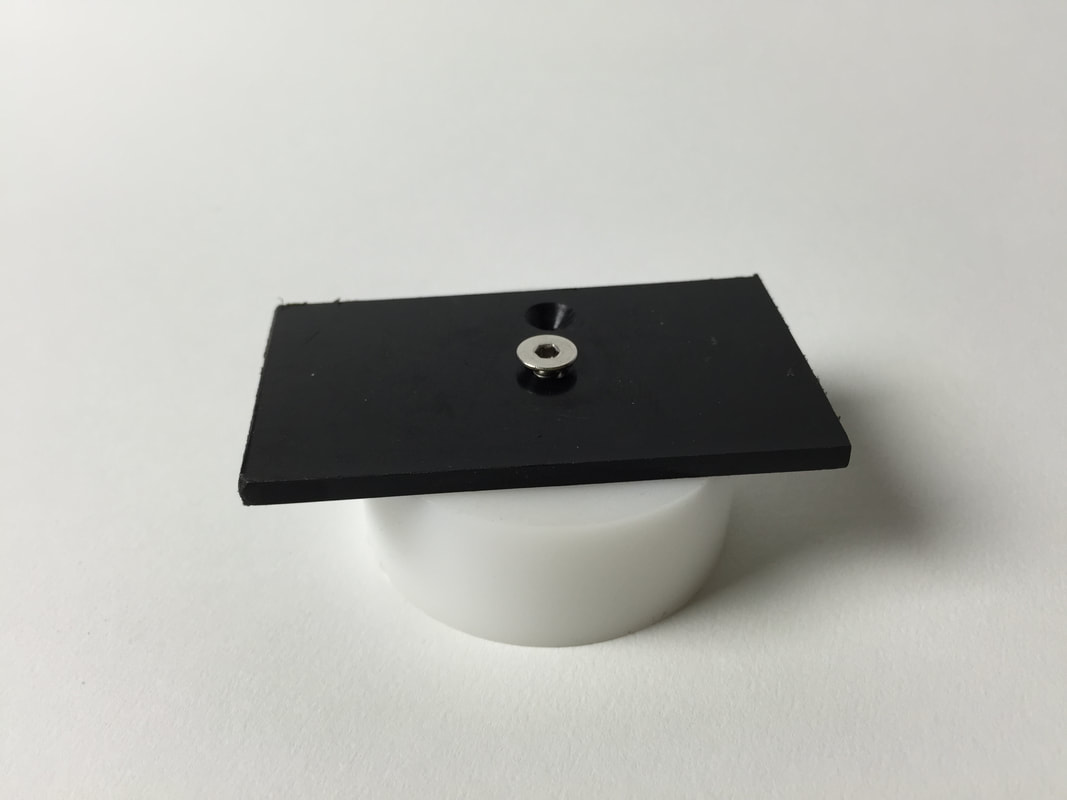
I had the idea to use the low KV brushless motors being used in camera gimbals at the time as drive wheels for a silent spy robot. Because the motors had a high torque, and because of the sinusoidal driving scheme, no gear reduction was needed. This concept eliminated a lot of noise, complexity and potential for failure from the typical small robot design.
The first design incorporated a small camera and video transmitter, 3D printed 2-axis camera platform and main chassis, laser-cut aluminum motor mounts (for motor cooling), and silicone tires made from 3D printed molds. The first prototype was a success. I could remotely operate the vehicle from across my apartment and was able to travel about undetected by my college roommates for the entire 20-minute battery life. I then set out to make a nicer looking, more finished version. |
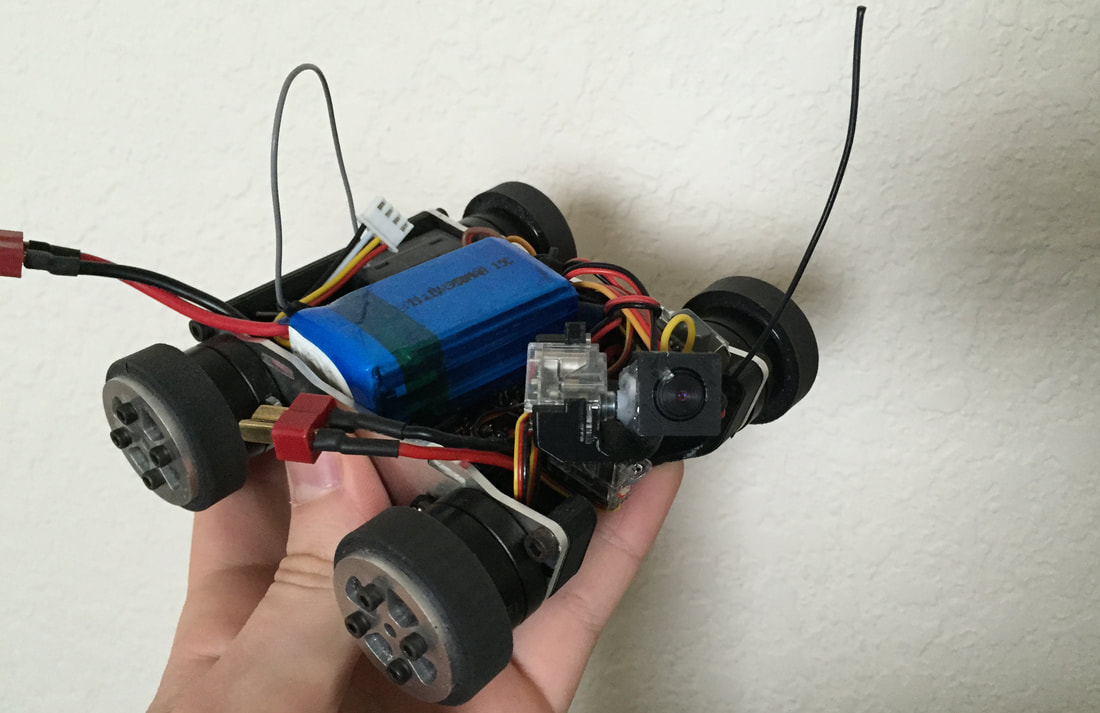
First prototype.
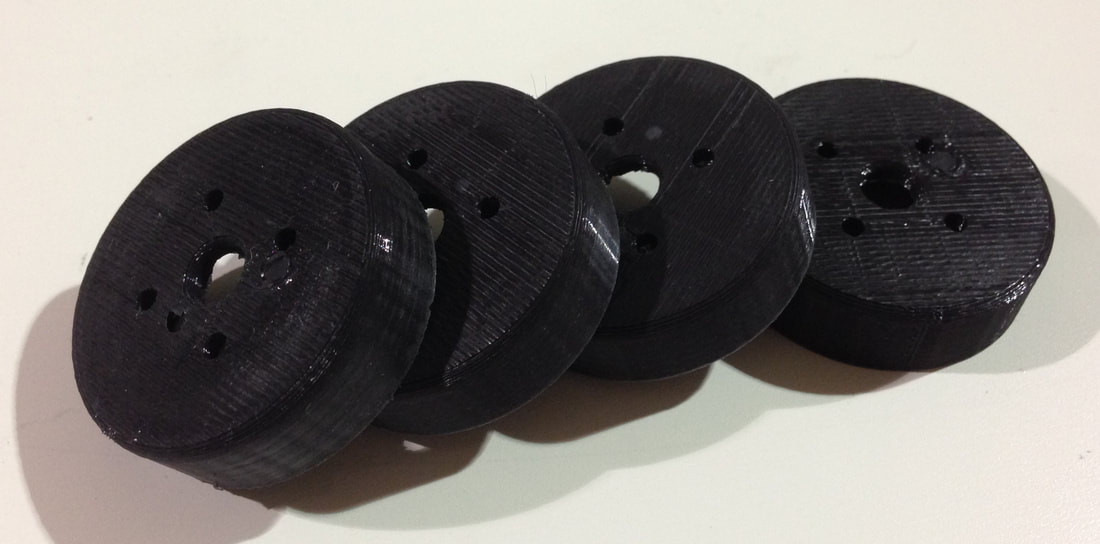
Silicone tires designed to be clamped directly onto the drive motors I selected. Made with a 3D printed mold.
|

CAD drawing for fully enclosed silent robot.
|
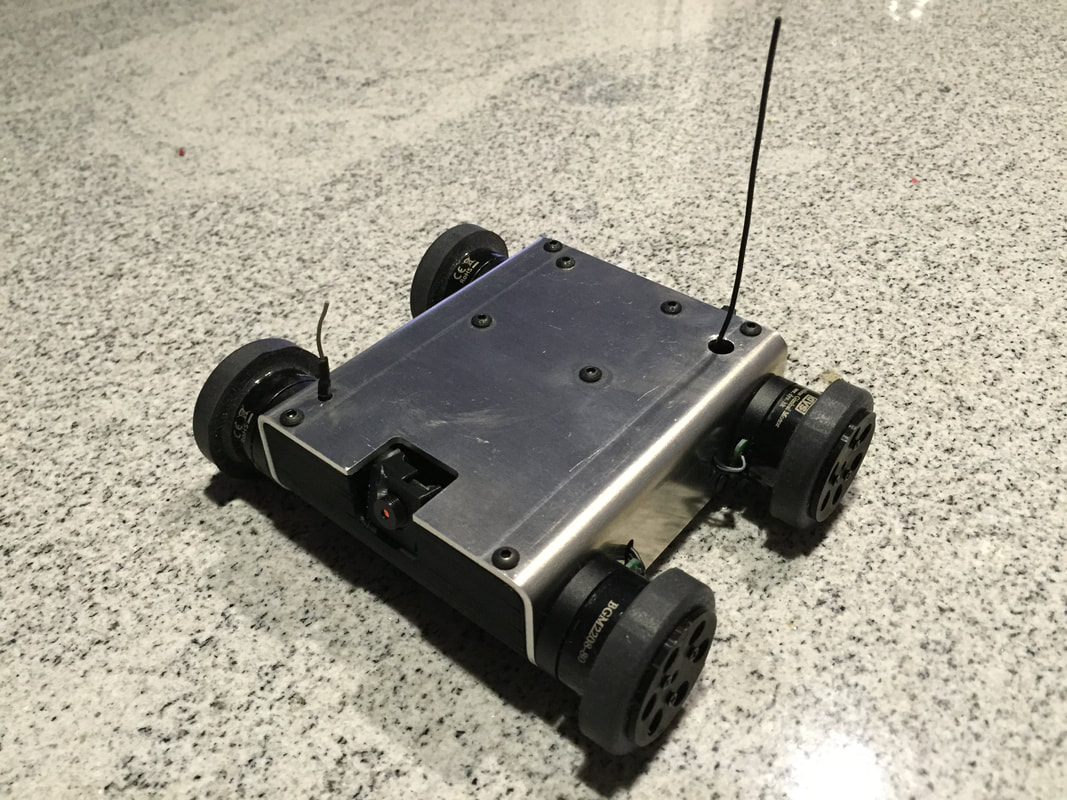
Actual silent robot assembled and working, before black paint.
|
The new design is fully-enclosed, featuring a large laser-cut and bent aluminum upper chassis, and 3D printed lower chassis. The track width is wider for smoother turning, there is an integrated antenna mount, and a larger battery for longer missions. I designed a new dual brushless motor controller PCB for this ROV as well, to make the entire package more compact.
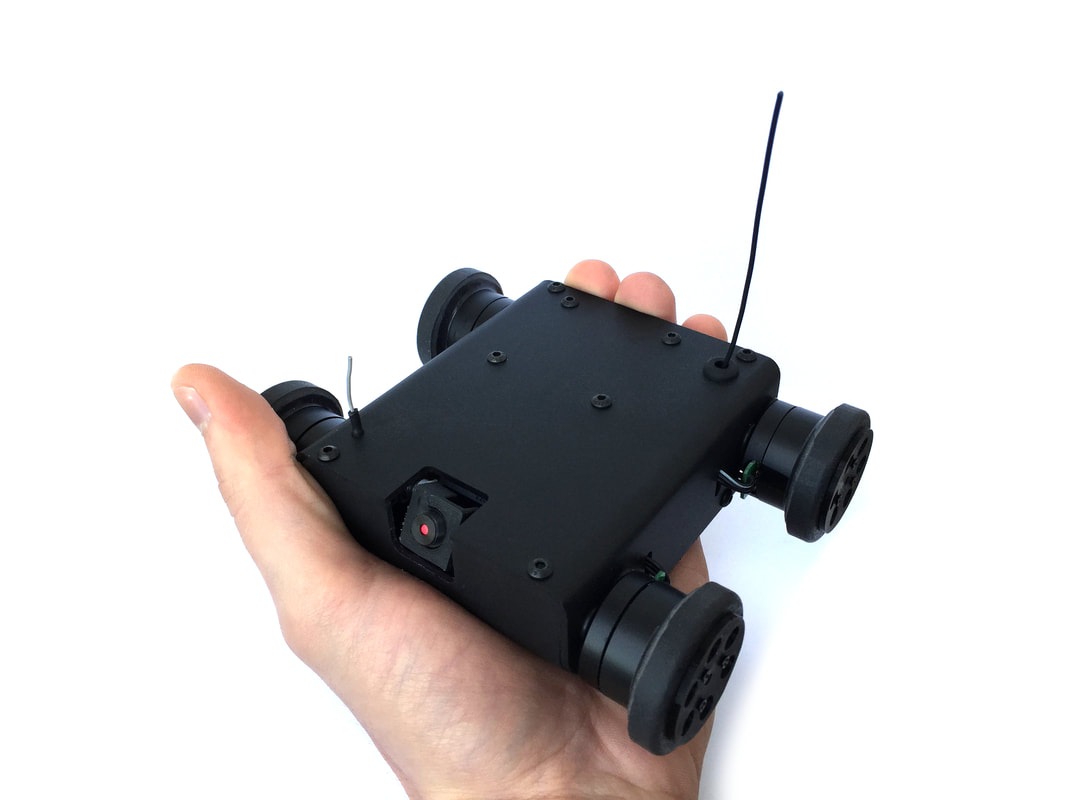
Finished product, painted black and fully tested. Battery life is currently 40 minutes, with plans to double that in the next version.
Side Note: Vacuum Chamber
|
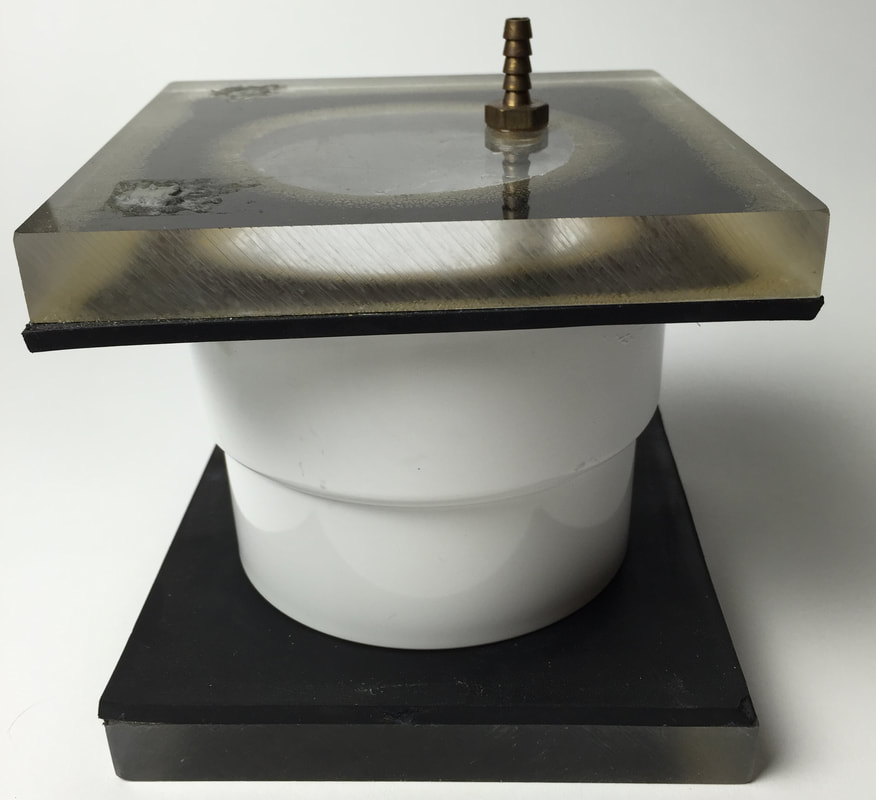
With most silicones, vacuum degassing is necessary. Professional vacuum chambers were too expensive for me, and way bigger than I needed. I constructed my own from a couple pieces of thick acrylic, some adhesive-backed rubber, and the thickest pipe coupling I could find. This gets attached to a cheap vacuum pump I found online, and I’ve used it for all my silicone projects. It works really well.
I have always considered myself to be very resourceful. If I want to do something, I make it happen. This vacuum chamber is a good example of that. |
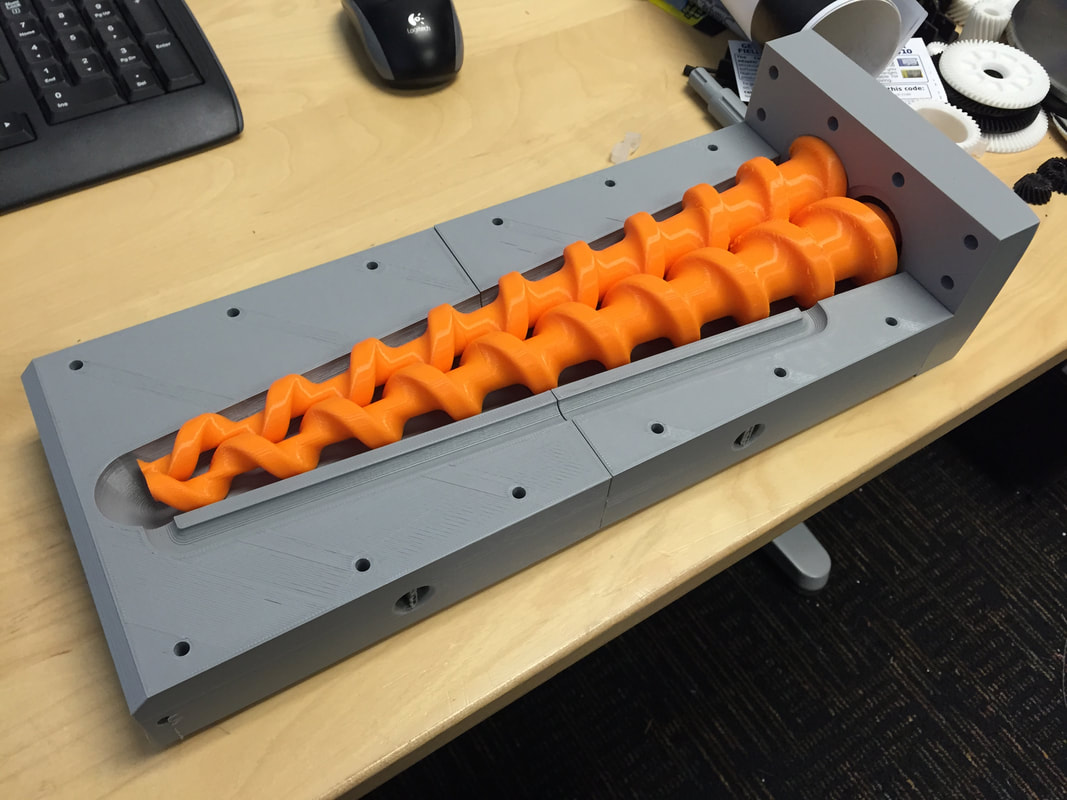
Twin Screw Extruder (2015)
My senior design project for engineering school was a twin-screw extruder that would simultaneously heat, pressurize and extrude plastic filament for use in a 3D printer. The screws in this design were going to be very complex, as they needed to be conical as per the requirements. My CAD expertise made me the best candidate for designing the 3D model. Nailing the design requirements down took some back-and-forth as it always does, but here’s what the final CAD model looked like:
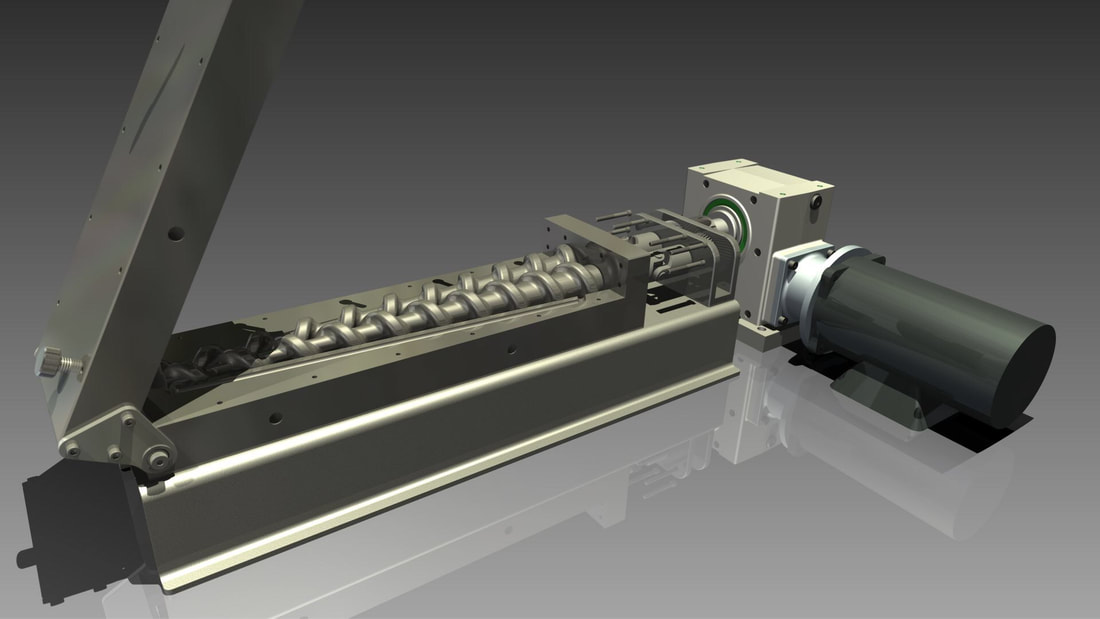
Rendering done in Autodesk Inventor.
After the design was reviewed and approved, I set about 3D printing a mock-up of this assembly. It had to be printed in segments, since the printers I had access to were not big enough to print most of these parts all at once. For example, the screws had to be printed in three segments, with key holes for pins so they could be precisely fastened afterwards.
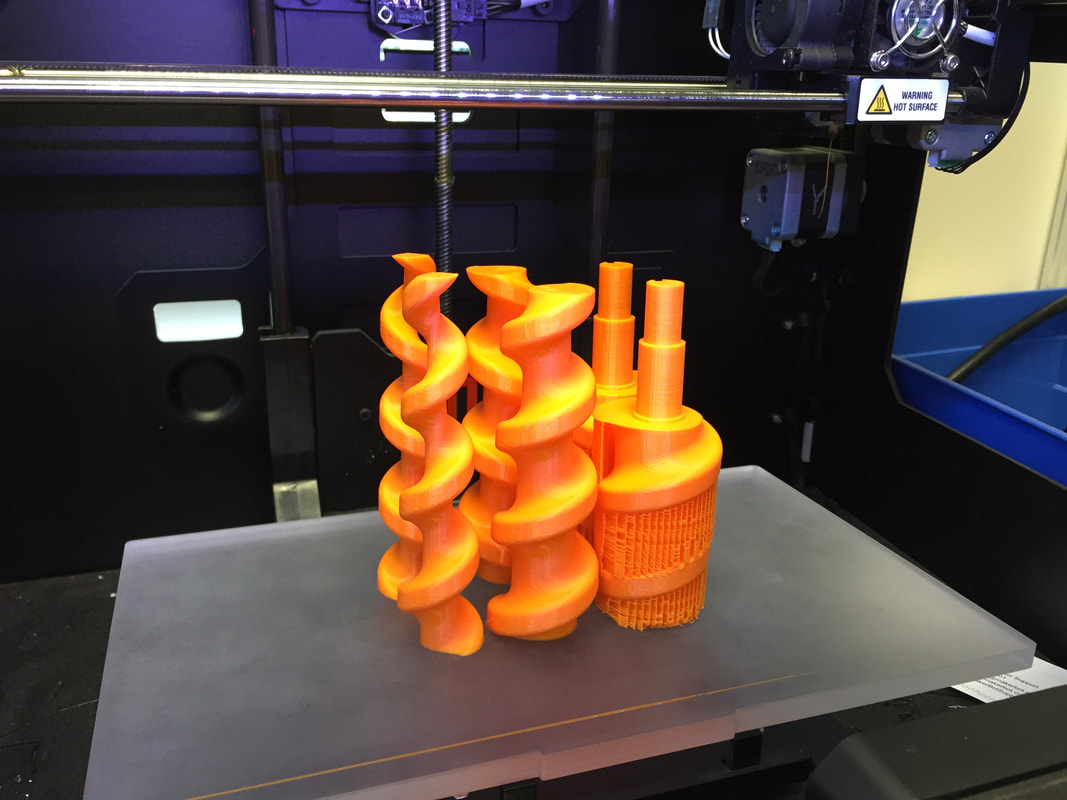

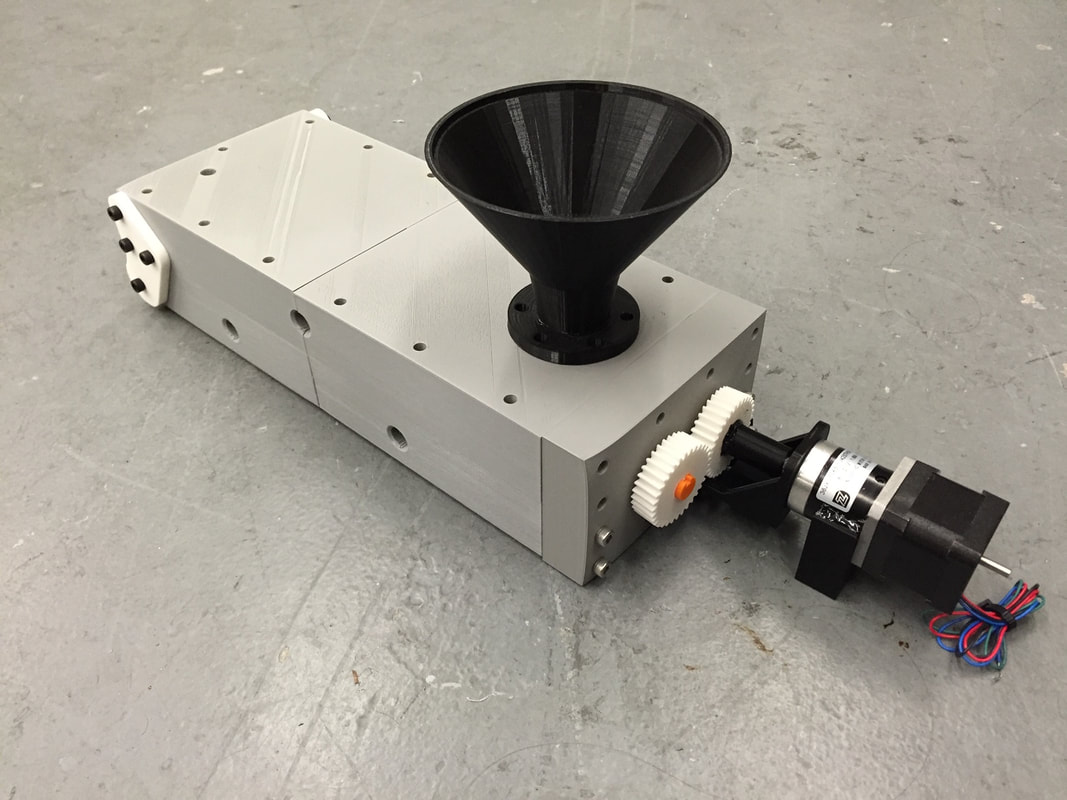
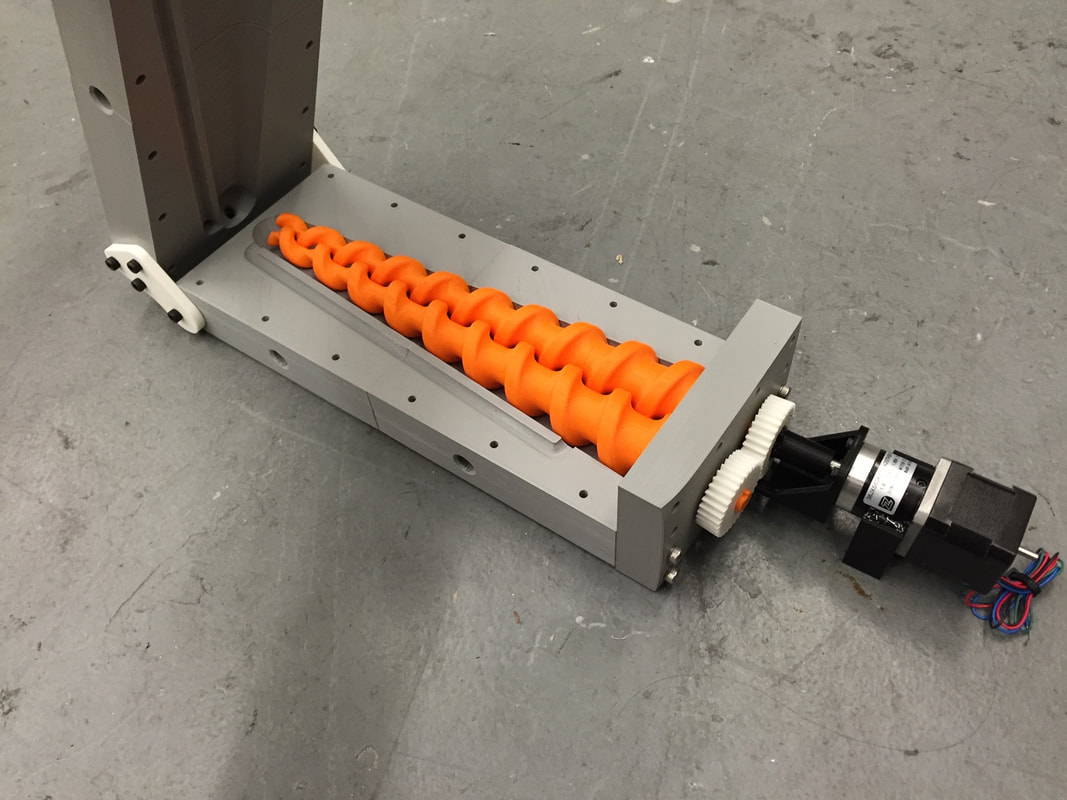
The final version of this extruder was to be machined from stainless steel. Towards the end of this project my team and I worked with several different machine shops to get quotes for all the components and organize them into a BOM. The 3D printed extruder features everything that would be present in the final version, including a solenoid-controllable feedback path, conical spur gears to link the two screws together, hinged access for cleaning and maintenance, and a gear motor for control. We received an A on this project.
|
|
CFD Analysis (2015-Pres.)
|
|
I decided that it would be both interesting and useful for my engineering career to learn to perform CFD analysis. I used the educational versions of Autodesk Inventor and Simulation CFD to design and analyze various ducted fan designs for use in my wall climbing robots (covered later in this document).
|
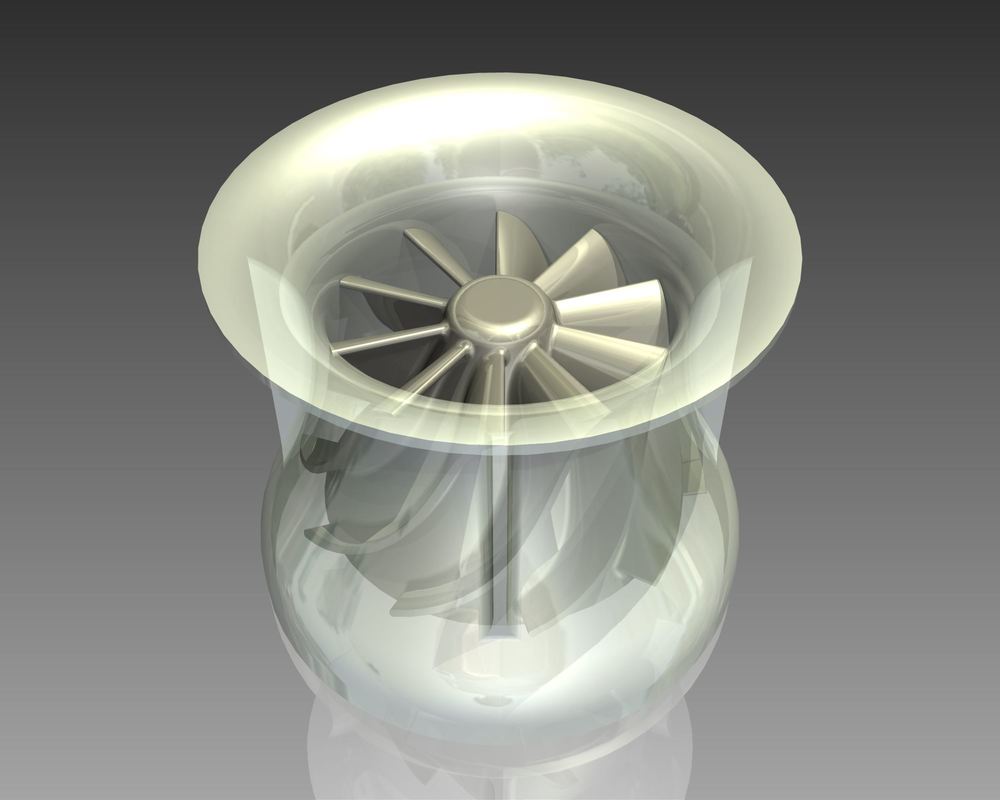
Experimenting with different axial, radial, and mixed flow configurations is fun.
|
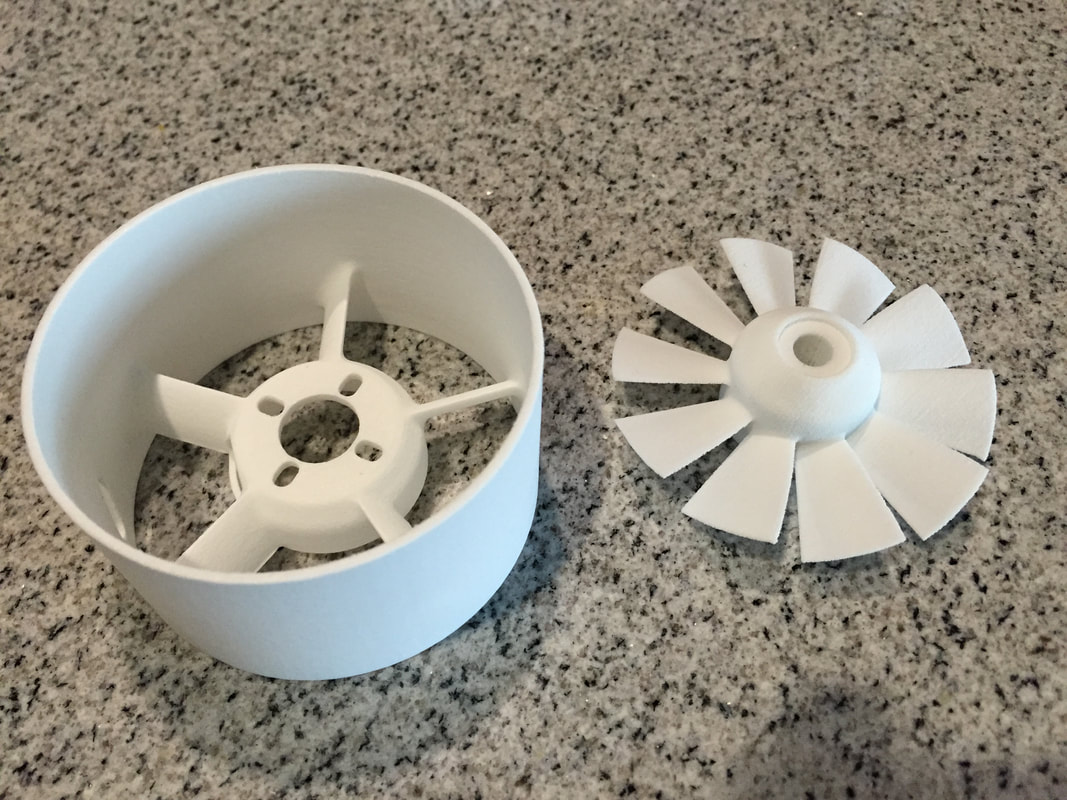
I have designs SLS 3D printed from time to time, for testing.
|
FPV Quadcopters (2015-Pres.)
|
Being a decent pilot, it was inevitable that I would get into the FPV racing scene. As an engineer, it was without question that I would design and build my own frames. All designs were done in Autodesk Inventor, here are a few of them:
|
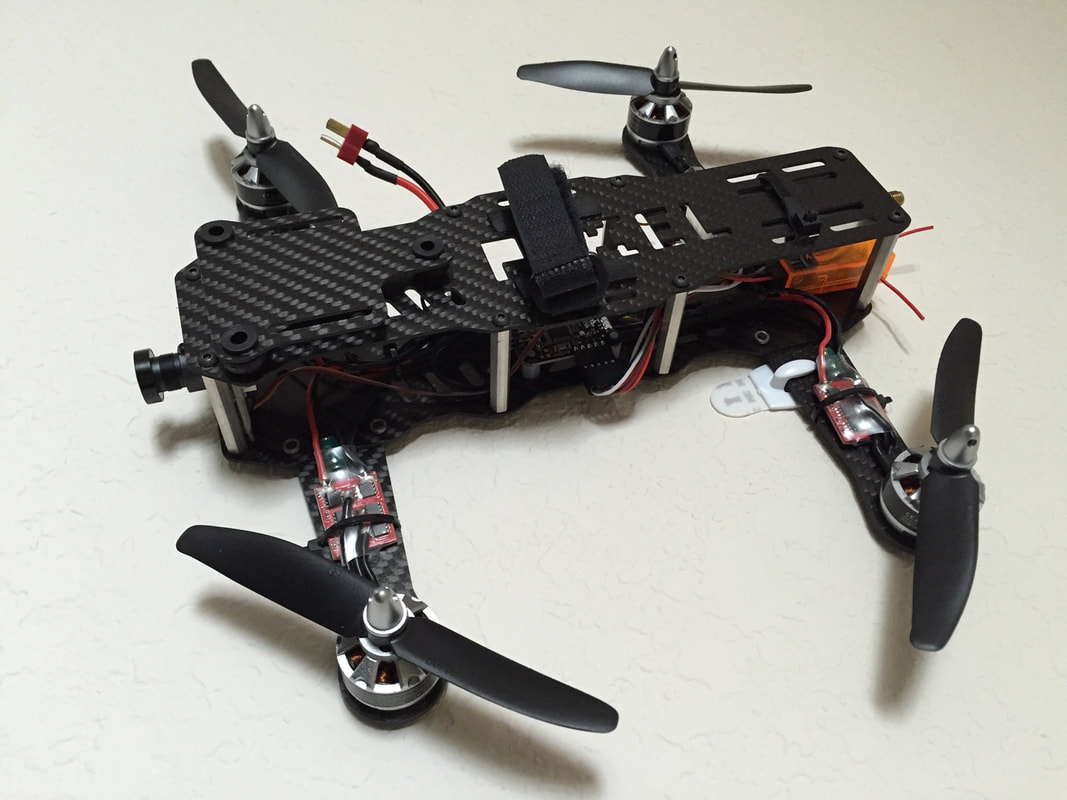
This frame featured continuous carbon fiber arms that were clamped in place, with no screw holes through them, eliminating stress concentrators. I have never broken one of these arms.
|
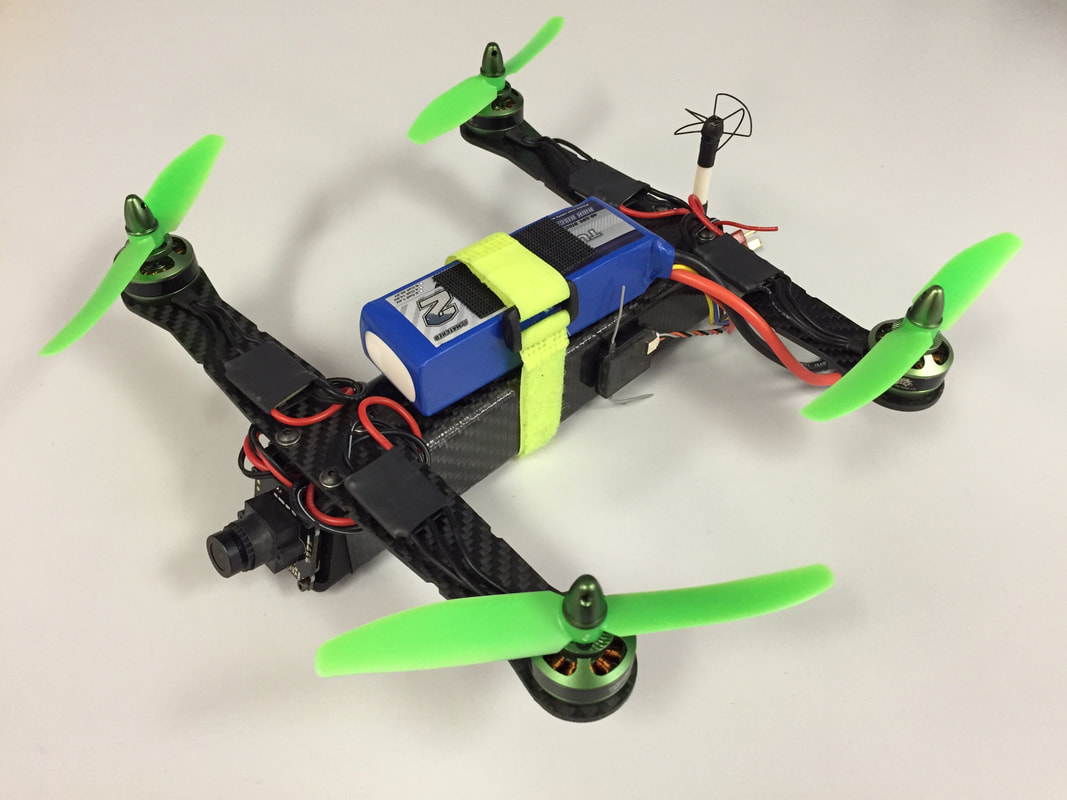
This frame used a single square carbon fiber tube segment as its main body, and most of the electronics fit inside of the tube. This made the frame ultra-light and provided great protection for all of the electronics.
|
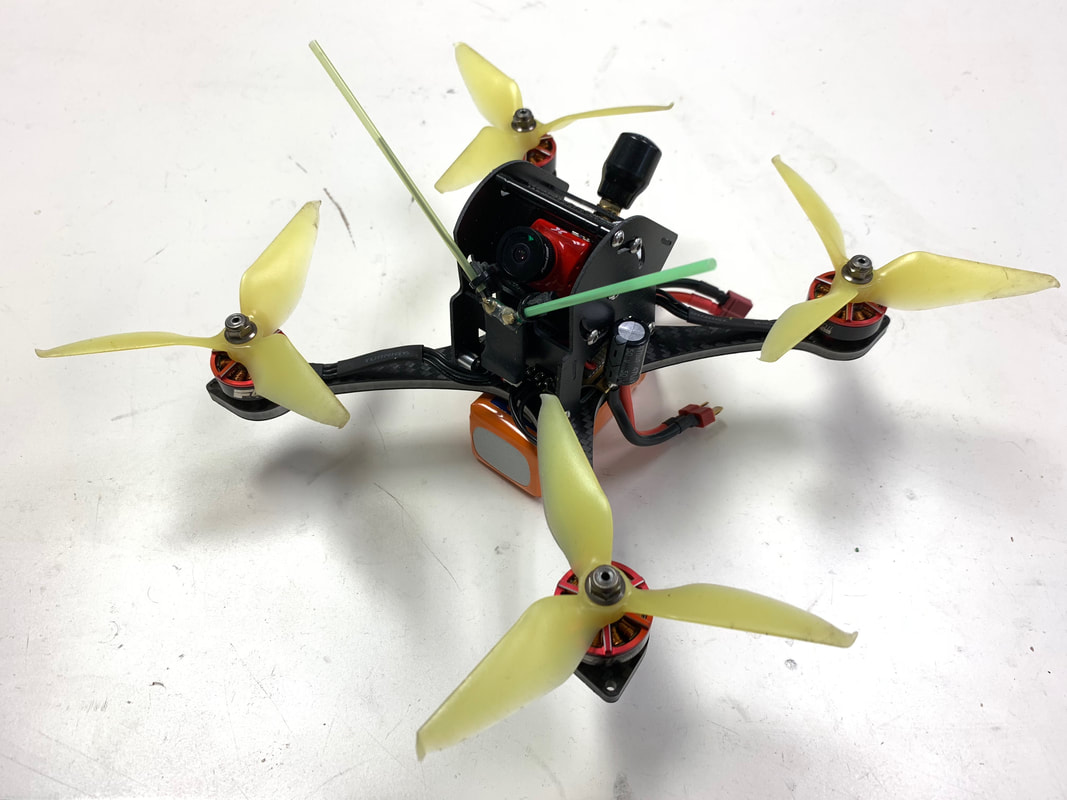
The ultimate racing quad. Lightweight foam-core carbon fiber frame, with all the electronics mounted directly in the center, and 24V power make this 100mph quad downright scary.
|
Wall Climbing Robots
There is one specific project of mine that has had me hooked, it's just such an interesting engineering problem across all disciplines. Wall climbing robots require deep knowledge of aerodynamics and fan design, lightweight strong materials and construction, and highly efficient electronic design. This series of projects started as a silly “what if” and turned into a promising product idea with many potential applications.
Version 1 (2011)
|
As the first trial, this was simply a laser-cut acrylic plate with a bunch of robotics components stuck to it. It was messy, but it worked, and I learned a lot from it. This ROV lasted about 2 minutes and 30 seconds on a charge.
|
A single laser cut acrylic plate can go a long way.
|
A powerful ducted fan provided the suction.
|
Version 2 (2012)
|
Version 2 was the result of overconfidence gained from the success of Version 1. This ambitious design was big and heavy, and although I did build a real-life version, it was so far from successful that I ended up taking it apart and using the components for other projects without taking any pictures. For that reason, I only have screenshots of the CAD model.
I'm willing to show off this failure because I learned from it, and it taught me some important lessons that I apply to every new design today. |
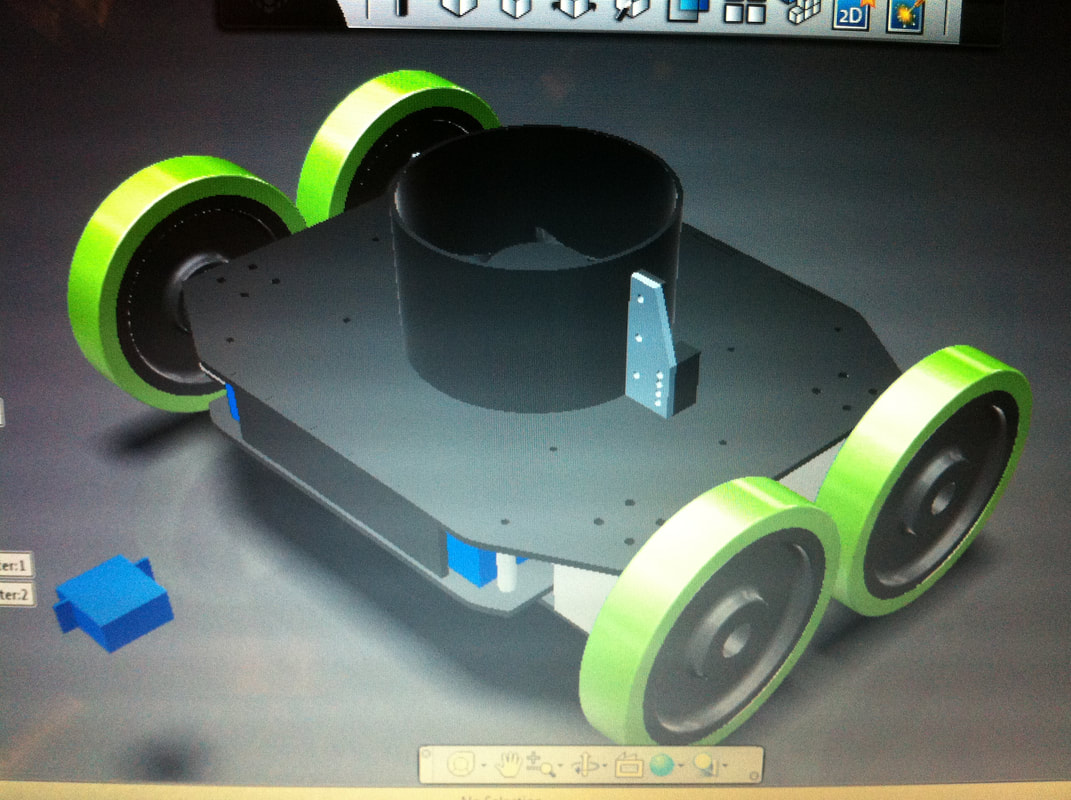
A mistake to learn from.
|
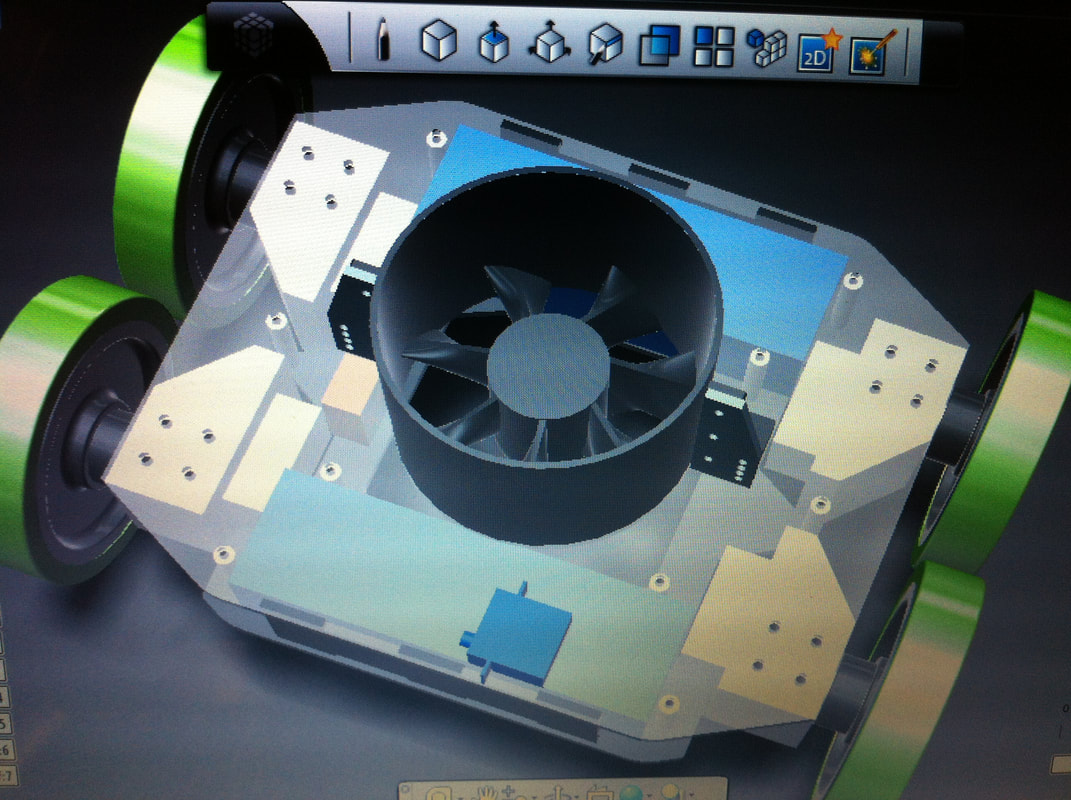
Large batteries and drive motors made this thing a beast...weight wise.
|
Version 3 (2013)
|
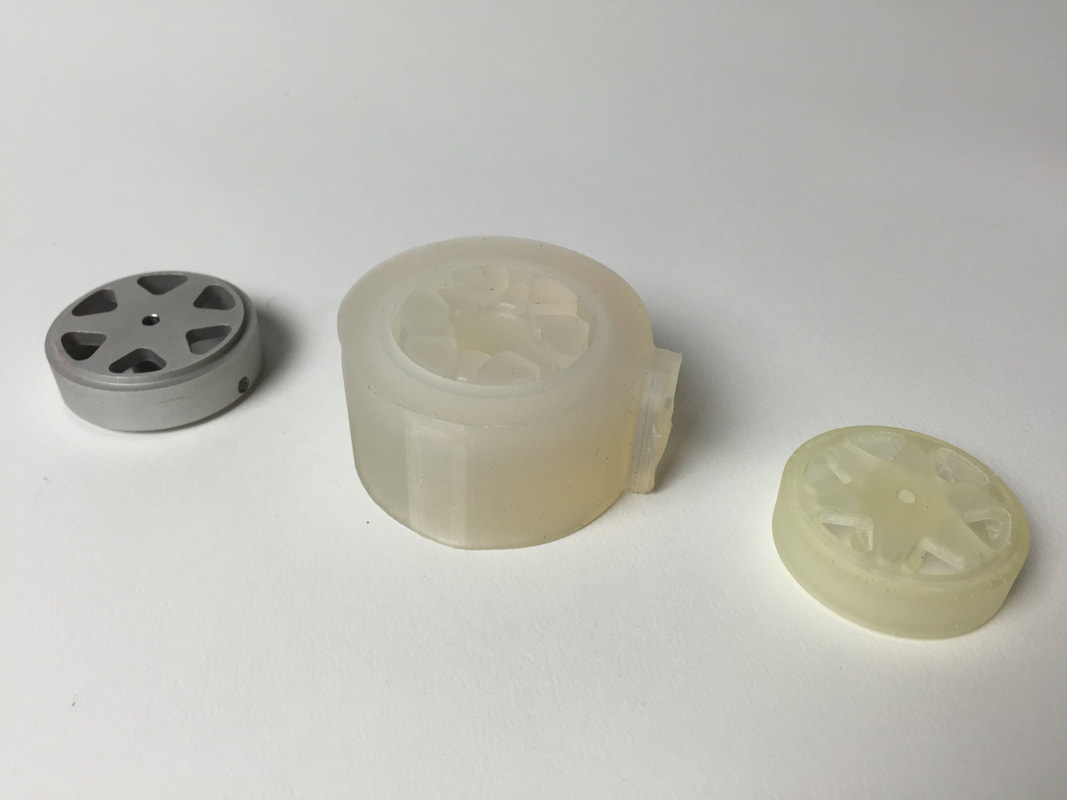
I spent a lot of time on the next wall-climbing ROV and worked very hard to perfect the design. I also spent a lot of money on high-performance components, such as a machined aluminum ducted fan and custom-cut carbon fiber chassis plates, and designed my own wheels and tank tracks, made 3D printed molds, and cast the parts myself.
I had a friend make me one wheel on their lathe, and I then made a mold of that wheel and cast more urethane plastic versions. |
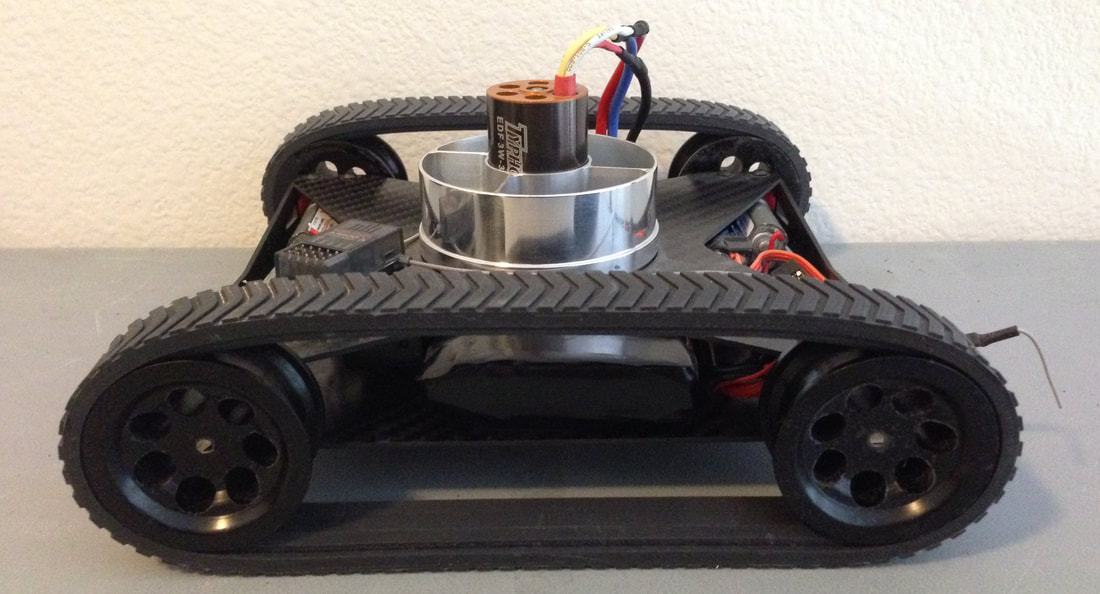
Version 3 was the coolest looking version by far.
|
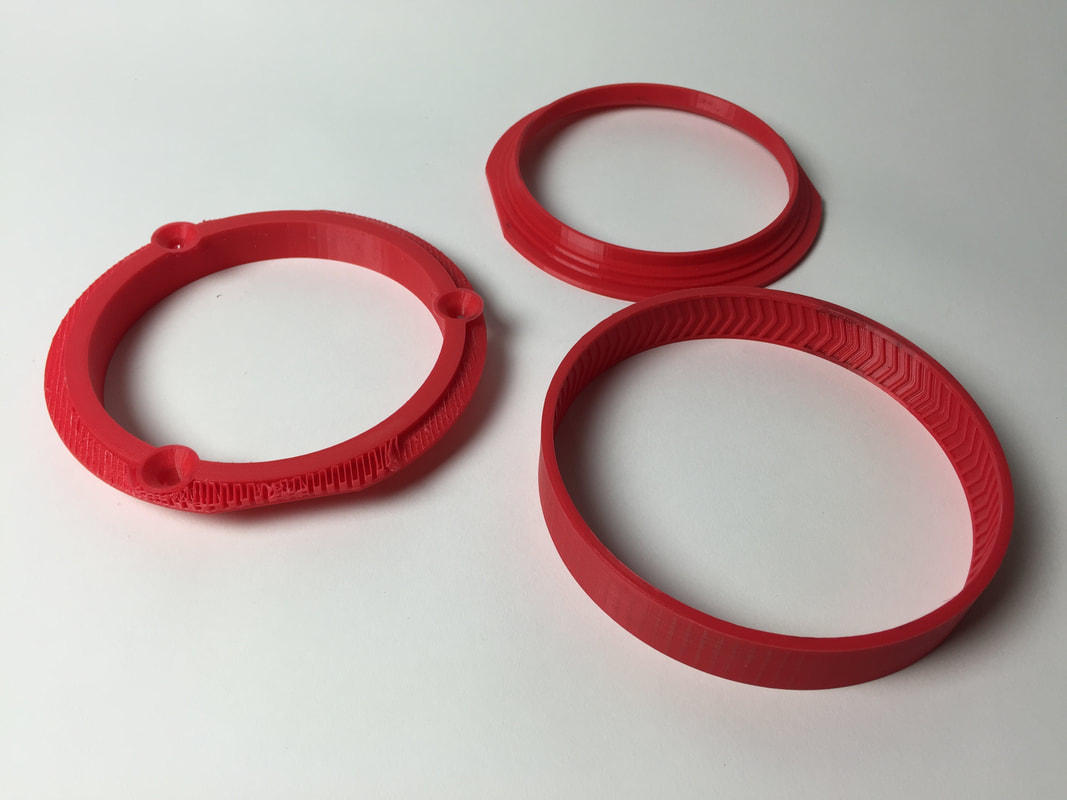
Three-piece, 3D printed mold for silicone tank tracks.
|

Completed silicone tank track and a couple of molded wheels.
|
|
|
|
Version 4 (2014)
|
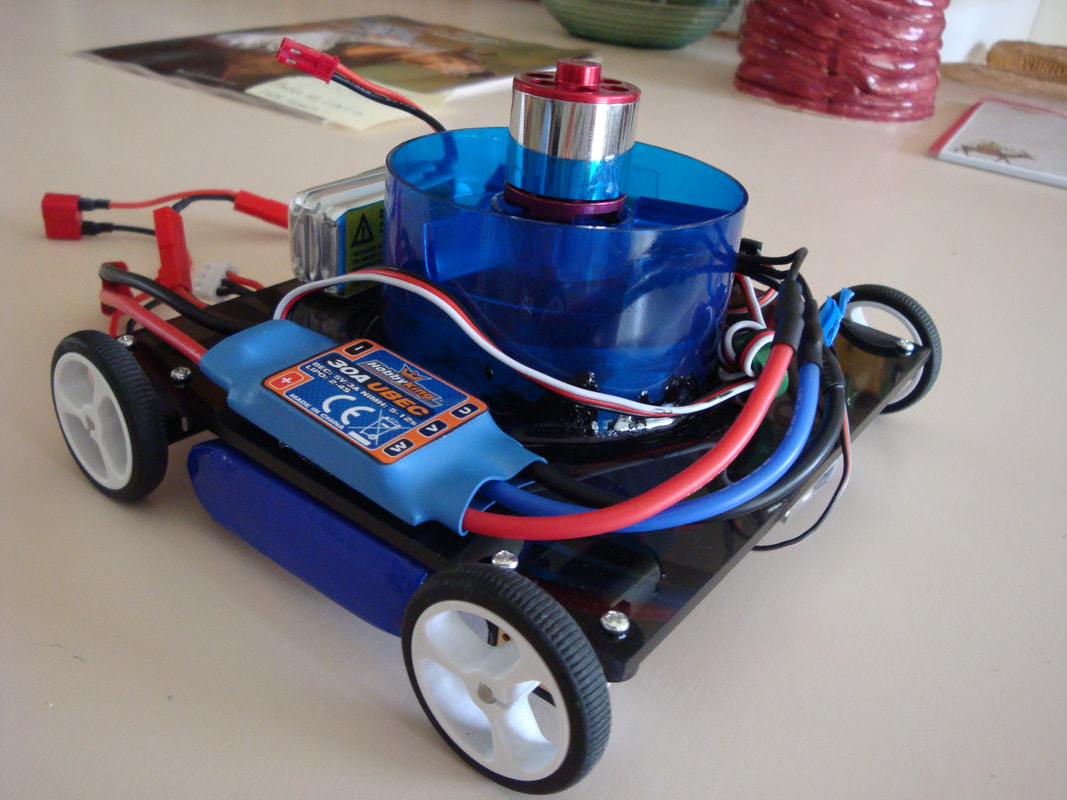
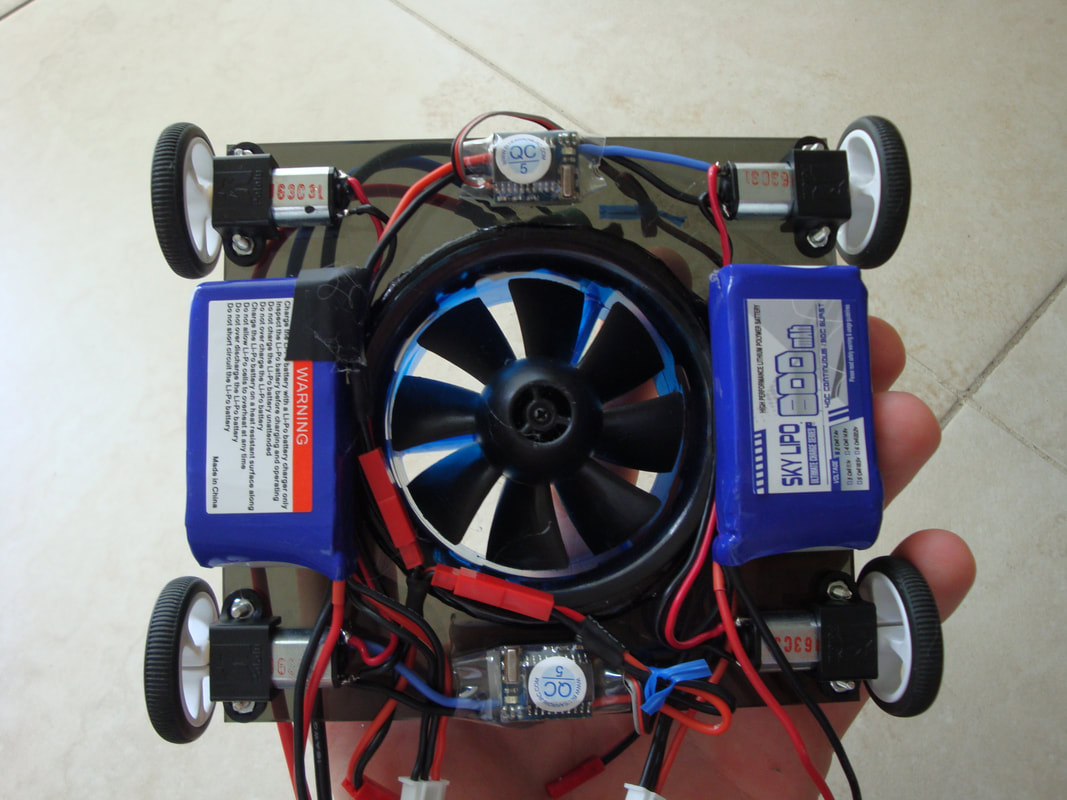
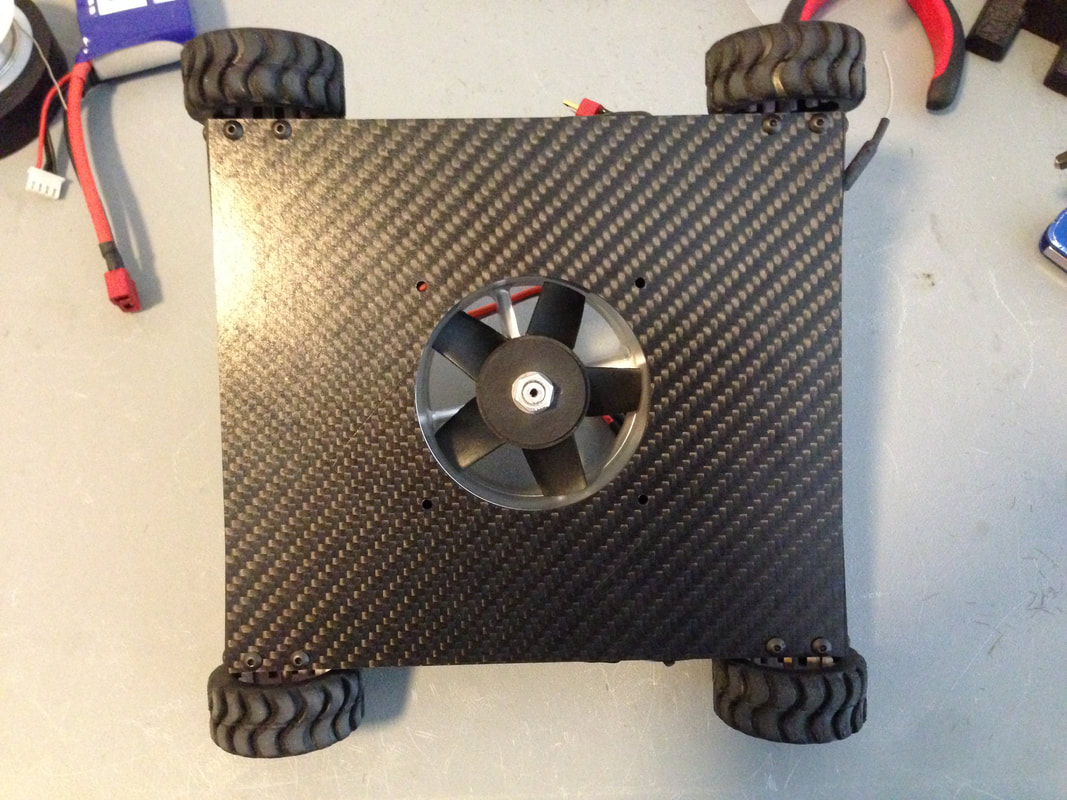
The goal for version 4 was simplicity, integration, and low cost. One simple idea achieved all three of these goals: a PCB chassis. The wiring for this ROV was now fully integrated, simplifying the entire design, keeping weight down and reducing construction time.
I sold just over ten of these, and the profits funded future versions. |
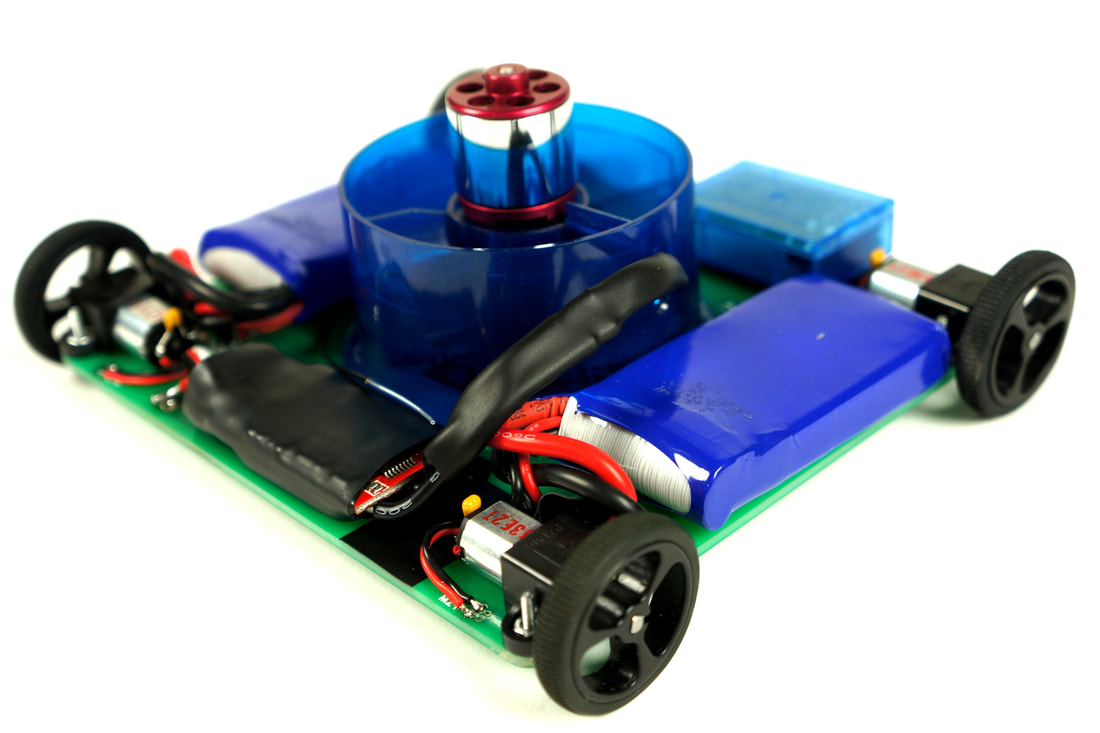
My intent to sell this version forced me to take more professional pictures.
|
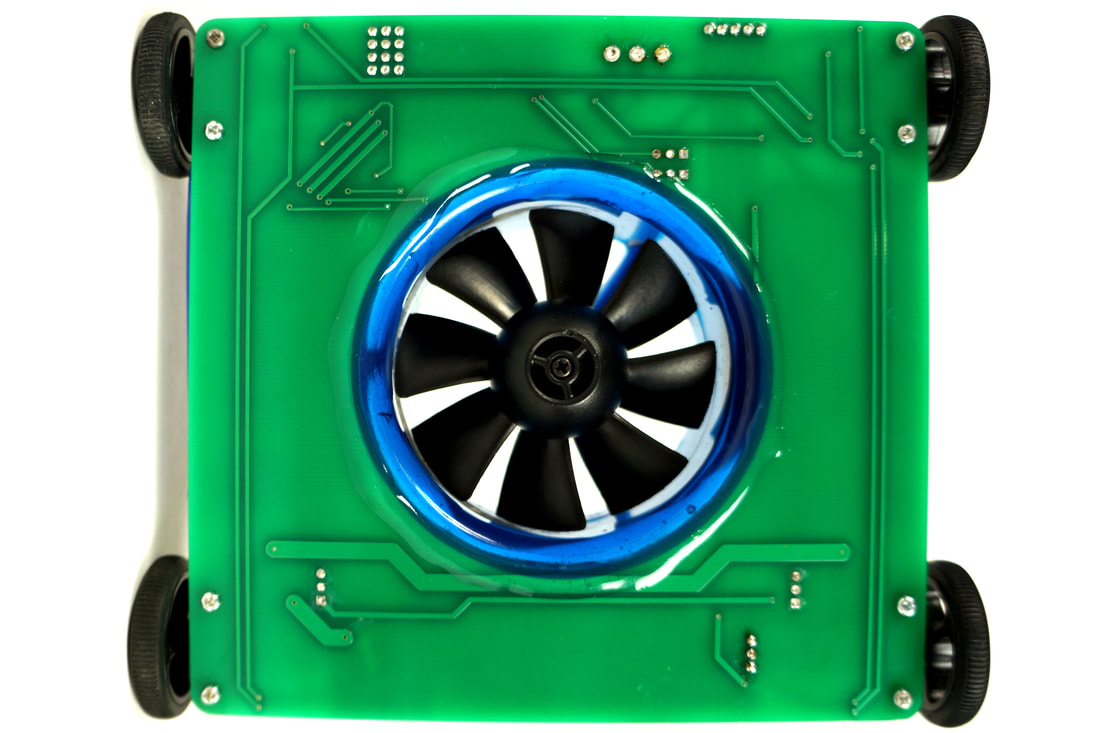
This was my first ever PCB. It simplified the wiring quite a bit, and allowed a user to charge both batteries through one convenient charge port.
|
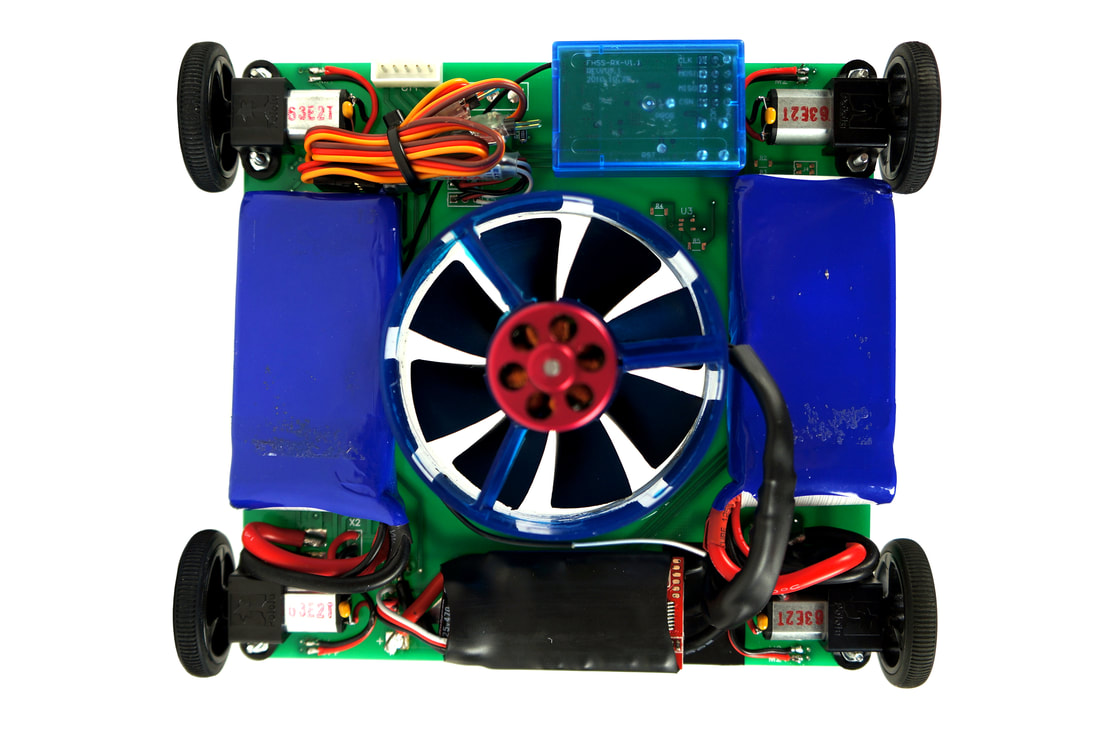
The same axial fan from version 1 was used, as I discovered it performed better than the more expensive versions I tested.
|
Version 5 (2016)
|
The previous version of this project had a couple problems: the PCB frame was heavier than expected, and there were exposed wires. Version 5 aimed to solve these problems, as well as increase battery life and overall performance. The control PCB (which also handled power distribution) was made to be as small as possible, in a shape and position that would also simplify wiring. The rest of the frame was thin carbon fiber and 3D printed SLS Nylon, designed to be very light and rigid.
|
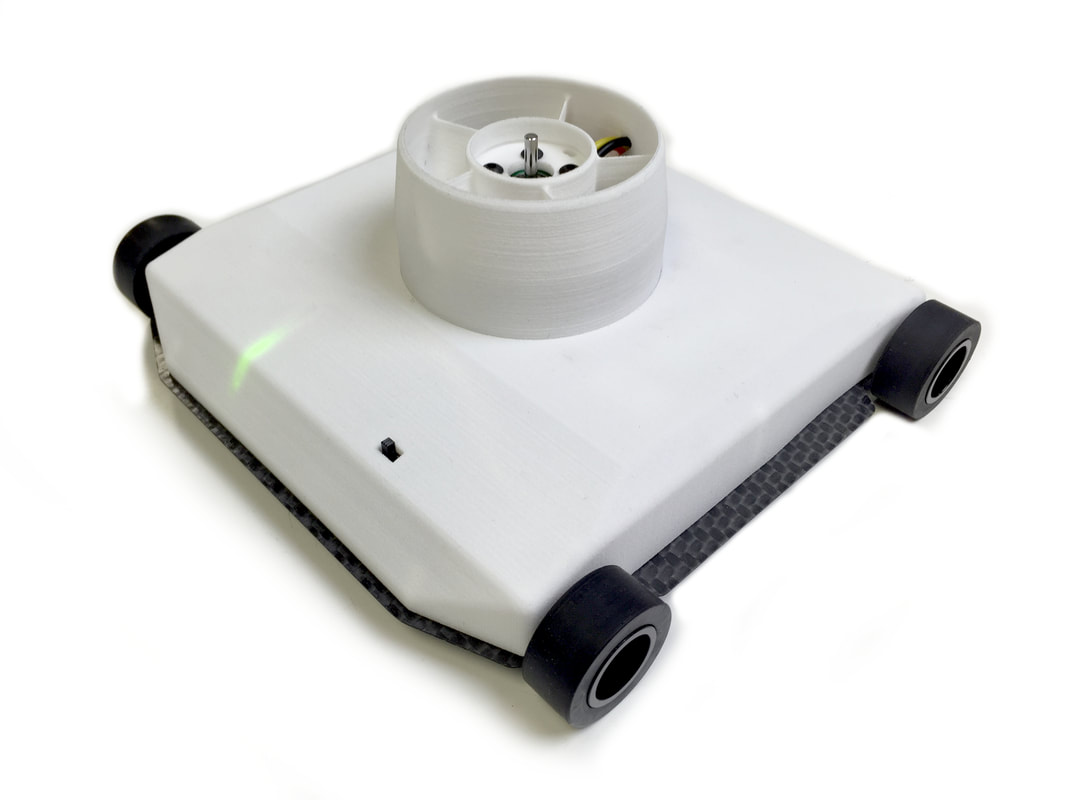
This simple design was the first of mine to hide all of the wires with an enclosure.
|
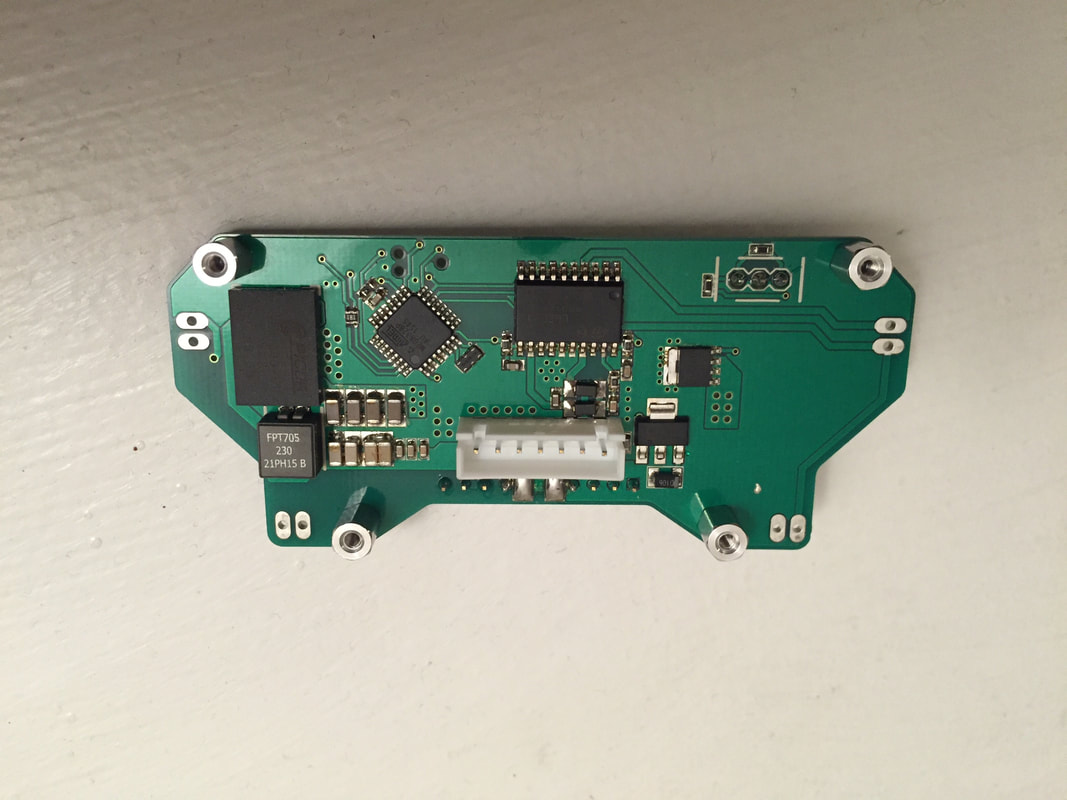
This PCB was my first try at soldering with solder paste and a reflow oven. It worked very well...that chip on the left has 123 pads underneath it!
|
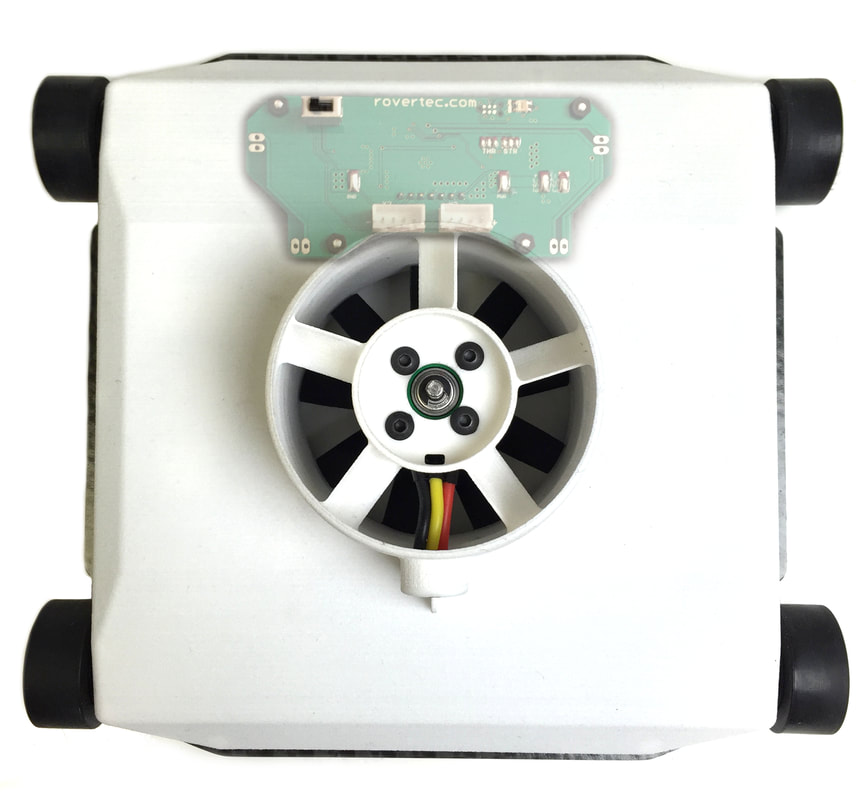
The PCB was shaped and placed in a location that simplified wiring.
|
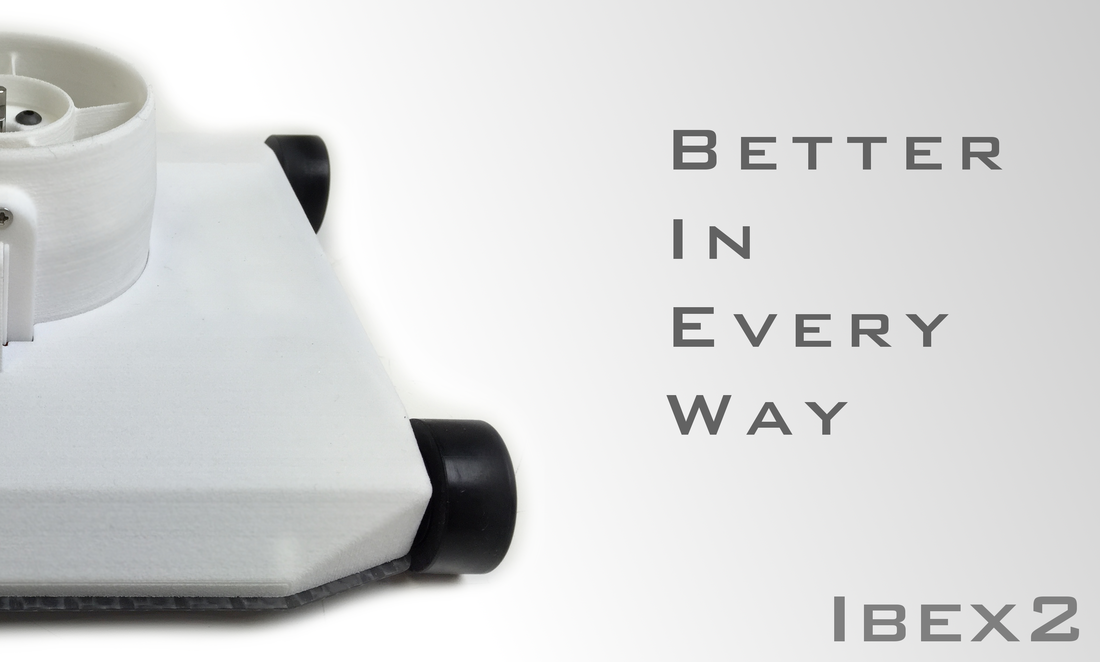
This wall climbing ROV was the biggest improvement yet. Battery life was 11 minutes...a huge improvement considering the first version only lasted for 2.5 minutes. This was sold on my RoverTec website (www.rovertec.com) as the Ibex2. I managed the entire process myself from the marketing, advertising, packing and shipping, and customer support. Here’s one of the ads that was on my website for a while:
|
|